
This article contains information about creating and using image templates for producing data and placeholders in a project.
Video Tutorial
The Templates tab, found under Project Admin, allows for the creation and management of templates for various aspects of the Review project interface. Templates saved here are available for use within the project. Use of this tool requires that the Admin->Manage Imaging Templates and Admin->Manage Templates permissions be assigned to your role.
-1.png?quality=high&width=688&name=59%20-%2001%20-%20Templates%20(Slipsheet%20default)-1.png)
Slip Sheet Templates
This function builds templates for production slip sheets, which are found within Slip Sheet tab under Project Admin->Productions. The Slip Sheet tab controls what documents are considered Excluded Documents for the production. Excluded documents will receive a slip sheet as its produced image. 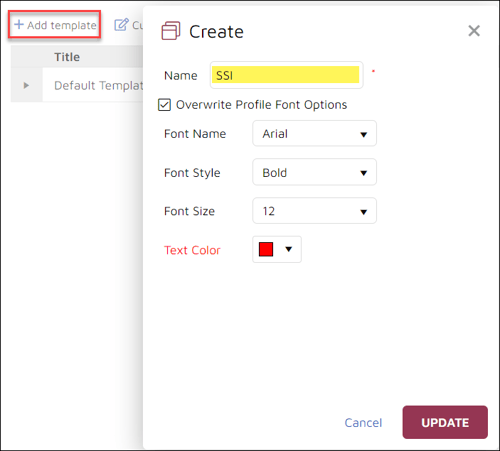
-
Click +Add template.
-
In the Create window, enter a required Name that will be easily recognized.
-
The checkbox defaults to Overwrite default font options so that any changes to Font Name, Font Style, Font Size and Text Color will be applied.
-
Click UPDATE when complete.
Customizing Slip Sheet Templates
-
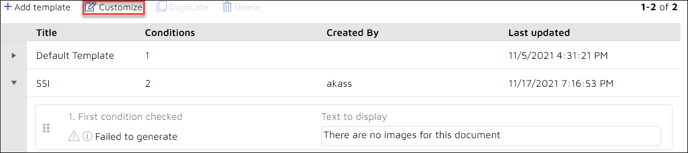
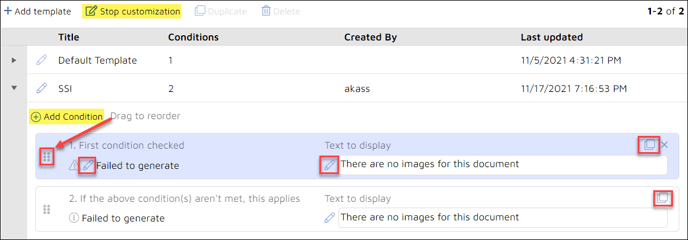
Click Customize. The button will change to Stop Customization and the default condition step will open.
-
You may add a condition step either using the + Add condition button in the upper left of the template entry or by clicking the double sheet button at the upper right corner of the condition.
-
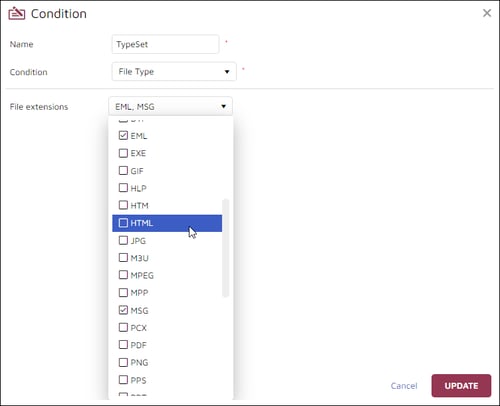
Edit the Condition (pencil button at the left). Enter a distinct name and select the identifying condition from among Work Folders, Saved searches, File Type or Privileged, then select the appropriate identifying condition from the pane below.
-
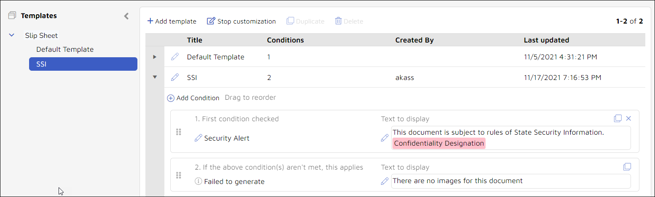
In the below example, documents grouped into the Work Folder OldWords are considered confidential. The below condition will exclude them from the production and insert Slip sheets that display their Confidentiality Designation. Click UPDATE to set the Condition.
NOTE: If File Type is selected as the Condition a File Extensions field will appear and open to a selectable drop list of available file extensions, excepting only file having no (blank) extension.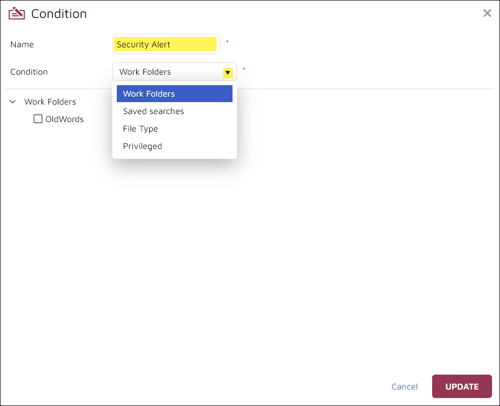
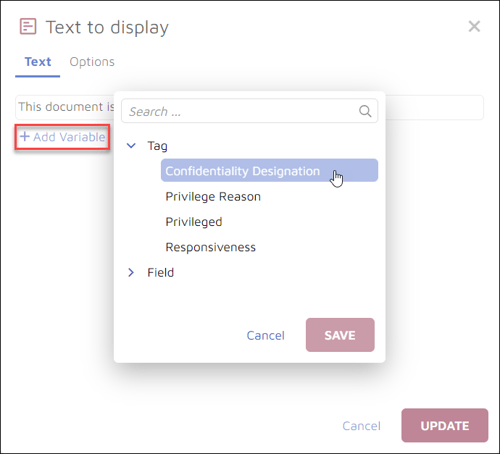
- Next click the pencil button under Text to display to update the slip sheet message.
-
Under the Text tab type in the text to be displayed. You then have the option to add a variable from either a selected Tag (represented in a salmon color) or Field (represented in a green color) for each slip sheeted document. Click SAVE to set.
-
The Options tab contains the initial font settings for the template, which may be updated here.
-
- The finished template will show the new conditions, which may re-ordered by dragging and dropping the 6-dotted handles at the left of each condition.
See How to Create a Production Job for an initial application of Slip Sheet Templates.
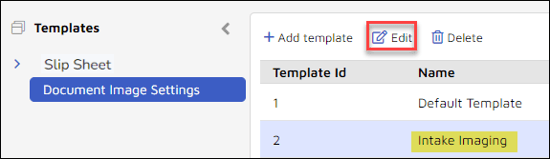
Document Image Settings
The second entry under the Project Admin Templates tab sets and saves imaging parameters for various file types.

-
To create a new template in addition to the Default Template provided, click +Add template.
-
A File Type Settings box will open. Enter a name for the new template.
-
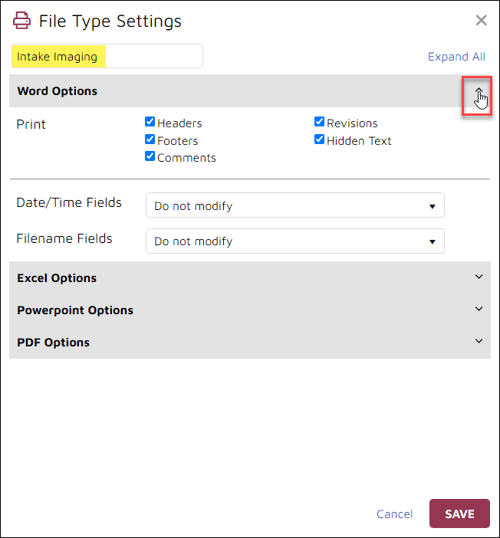
Click the drop-down arrow to expand each of the filetype sections, or click Expand All.
-
Word Options
-
Print has checkboxes for printing Headers, Footers, Comments, Revisions and Hidden Text.
-
Date/Time Fields offers a choice of
-
Do not modify (default)
-
Do not print
-
Replace with Date Created
-
Replace with Field Codes
-
-
Filename Fields offers the same options as above.
-
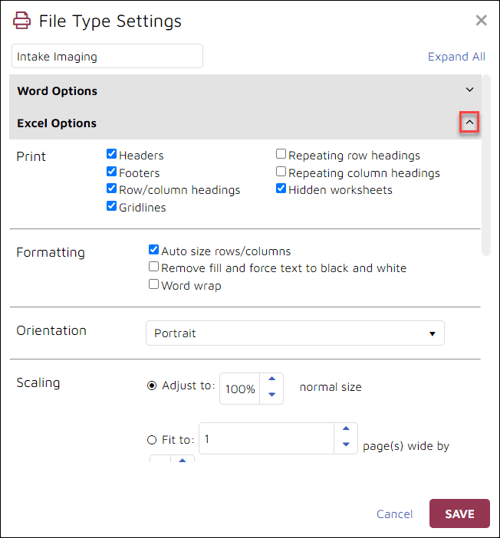
- Excel Options
-
Print has checkboxes for printing Headers, Footers, Row/column headings, Gridlines, Repeating row headings, Repeating column headings and Hidden worksheets.
-
Formatting has checkboxes for Autosize rows/columns, Remove fill and force text to black and white and Word wrap.
-
Orientation may be set for Portrait or Landscape.
-
Scaling sets specifications for the percentage of normal size to print, or the number of sheets wide and tall in which to fit each spreadsheet.
-
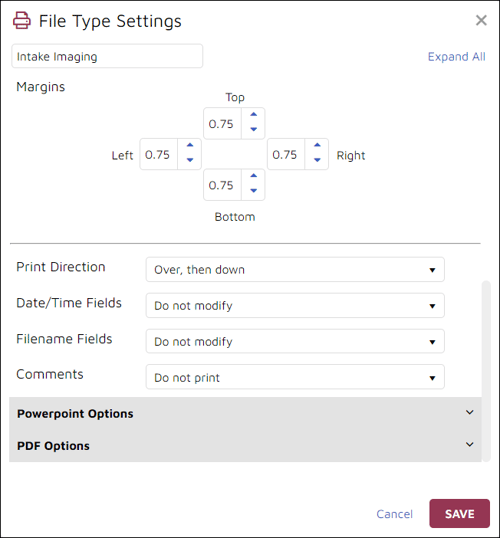
Margins settings for each edge of the image page.
-
Print Direction provides instruction for very long or wide worksheets: Over, then down or Down, then over.
-
Date/Time Fields offers a choice of
-
Do not modify (default)
-
Do not print
-
Replace with Date Created
-
Replace with Field Codes
-
-
Filename Fields offers the same options as above.
-
Comments offers a choice of Do not print or End of sheet.
-
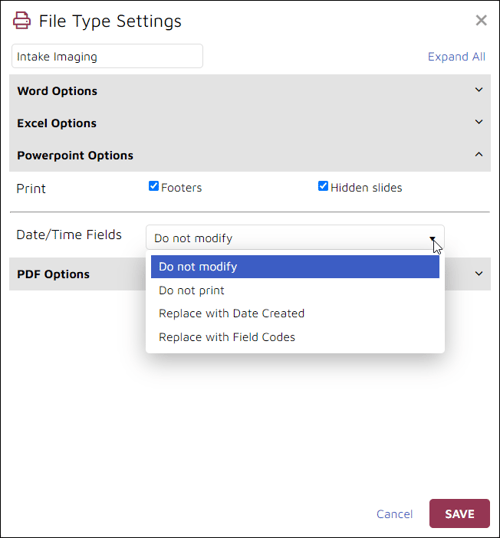
- Powerpoint Options
-
Print has checkboxes for printing Footers and Hidden slides.
-
Date/Time Fields offers a choice of
-
Do not modify (default)
-
Do not print
-
Replace with Date Created
-
Replace with Field Codes
-
-
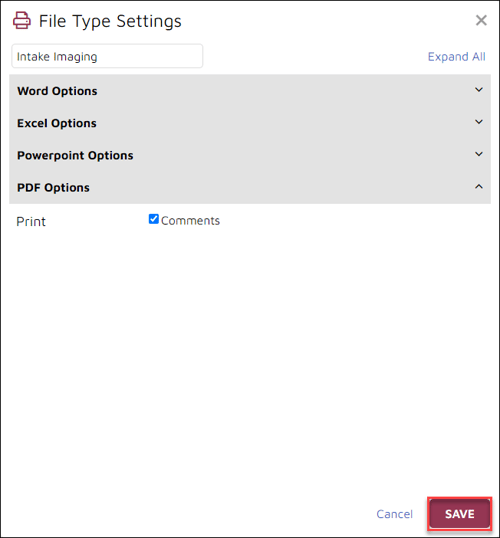
- PDF Options
-
The single option here is to elect to print comments.
-
-
Click SAVE when complete.
You may select the Document Image template created for any imaging process. You may also select and Edit or Delete the template.
Last Updated 9/29/2022