
This article provides both visual and written instructions for creating tags, tag profiles, and tag panes.
Non-Audio Video Tutorial
Tags are used to categorize documents and track review progress. Tags may also be linked to analytics scores. Tags may be created and are managed under Project Admin > Tags. There are two principle components of tags addressed here: 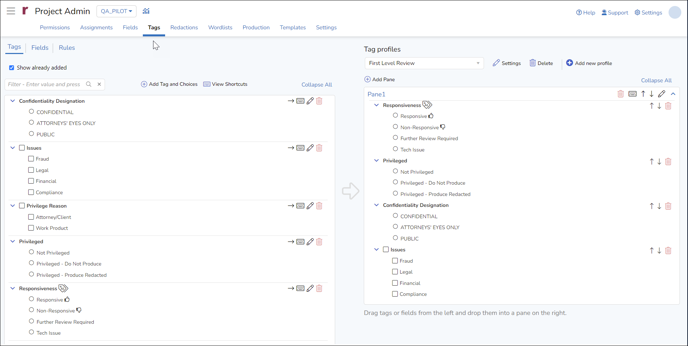
- Tag Profile: A tag profile is needed to build a tag form, give users access to tags (and optionally selected fields), and track review progress. Tag Profiles are added and edited atop the right-hand side of the Tags screen.
- Each tag profile is associated with a set of users and/or user teams.
- Each user or team may have access to more than one tag profile.
- Tag: A Tag is a container of choices for a given subject.
Create Tags
- Login to Reveal as an Administrator.
- Click Admin in the toolbar at left.
- Project Admin will open in a new window.
- Select Tags.
- Use Add Tag and Choices to create a tag in the left panel of the screen.
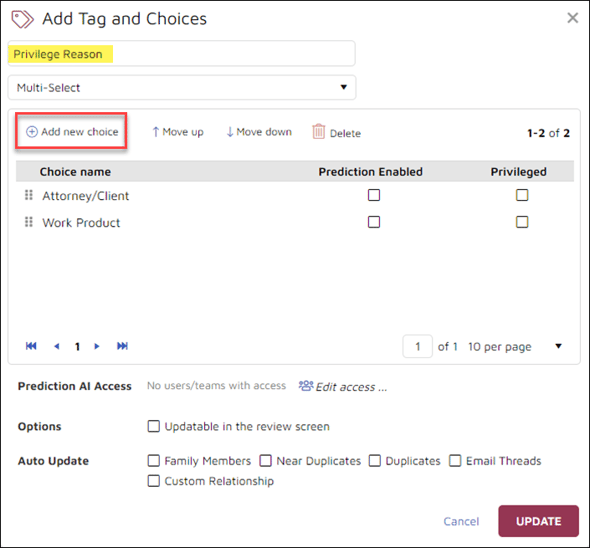
- Provide a name for a new tag (the above illustration is for modifying an existing tag).
-
Reveal has three Tag Types: Multi-Select, Mutually Exclusive and Tree.
- Multi-Select
- Checkboxes
- Allows users to select multiple choices for the Tag.
- Mutually Exclusive
- Radio Buttons
- Only one button can be selected
- Tree
- Multi-Level Checkboxes
- Multiple can be selected
- Supports recursive option
- Multi-Select
- Select Add new choice to enter the name of a selectable value under the tag.
- The grab-handle at left is used for reordering tag choices.
- Selecting Prediction enabled connects the tag to Reveal's AI engine to treat the setting of a tag choice by a reviewer as training for evaluating further documents. See Assigning Tag Visibility of the AI Score for further details.
- Selecting Privileged categorizes a document as privileged to facilitate that classification for production.
- Prediction AI Access allows teams or users to have visibility on the correspondent AI tag flags and scores while viewing a document through the document viewer window.
- Updatable in the review screen would allow modifications in the tag, for example, if an additional issue turned up it could be added directly as a choice. This is generally left unchecked so that all tag choices are the result of a managed process.
- The administrator may optionally enable tag propagation by selecting which document relationship types should to be tagged automatically. This is done by checking one or more of the following types for Auto update:
- Family Members,
- Duplicates,
- Near Duplicates
- Email Threads, and
- Custom Relationship
Defined by common values in a specified field. Selection here opens a drop list of available fields defined as Relational (see Custom Relational Fields for further details on this field type and its use).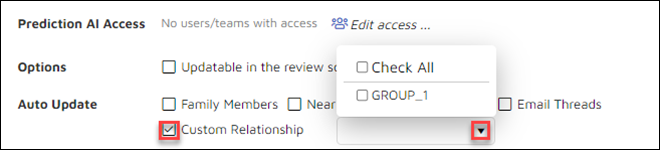
- Click ADD when complete (if modifying an existing tag, click Update).
- For information on the Tag Validation options under the Rules tab, see Tag Validation and Rules and Testing.
-
The other controls found in the upper right corner of each tag panel are:
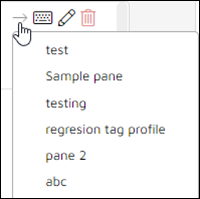
- Send to currently selected pane in current tag profile (in the right-hand panel of the Tags screen); the tag may also be dragged and dropped directly, where a red banner will show where the tag cannot be placed and the reason and a blue banner will indicate a proper placement.
- Shortcuts to designate a keyboard shortcut for a tag.
- Add Tags and Choices.
- Delete, which will prompt for confirmation before removing the tag.
You will not be able to delete a Tag if it is in use. An in-use Tag is one that contains at least one tag which has been applied to a document. To delete an in-use Tag you will need to first un-tag all documents which have one of its choices set.
Tag Profiles
Tag Profiles are collections of Tag Panes (see below) focused on a review phase or subject and assigned to teams or individual users.
A Tag Profile must be designated when creating a review assignment.
- To create a Tag Profile, click Add new profile at the top of the Tag Profiles panel at the right of the Tags screen.
- Enter a name for the Tag Profile, which should describe its review phase or intended use.
- Assign teams and users to the profile by moving them from the left (unassigned) side to the right (assigned) side of the popup window. You may enter filtering text to find and assign certain users or teams.
- Click CREATE.
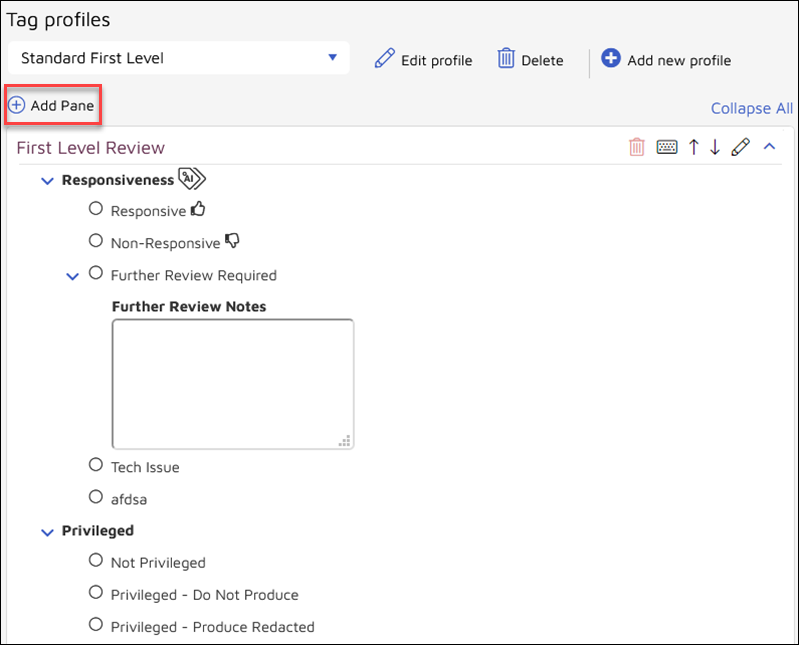
- Click Add Pane just below the Tag Profile toolbar to create a blank pane for building the profile's Tag Form. There may be one or more Panes in a Profile; there may be more than one Tag in a Pane.
- Give the Pane a name.
- Tags (and Fields, accessed in the second tab of the Tags pane on left side of the Tags screen) may be dragged and dropped into it. See two examples below showing different Tag Types and Form configurations: Standard First-Level Review with added Further Review Notes field, and Profile with multiple Tag Panes, including a prediction-enabled Mutually Exclusive tag and a Tree tag.
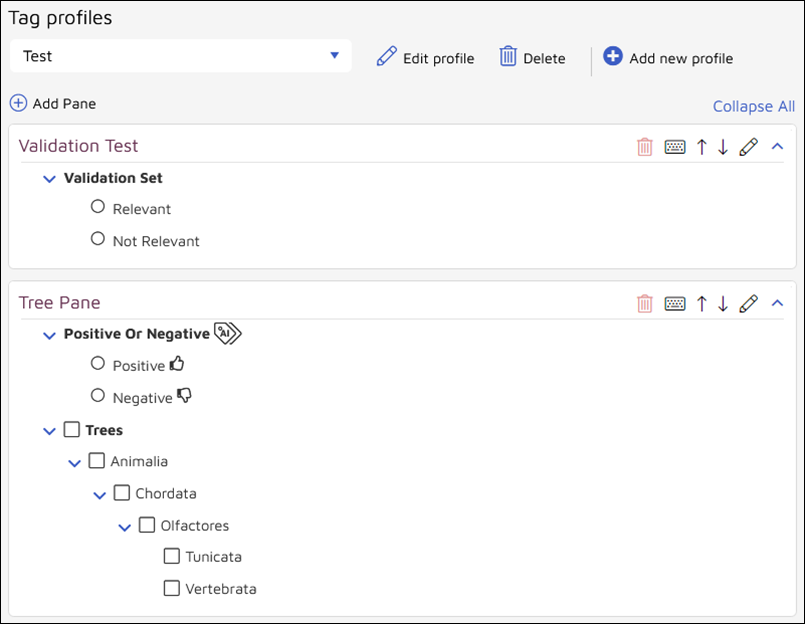
- Additional Panes may be added, and re-ordered using the Up and Down arrow buttons in the profile toolbar, for the profile's Tag Form. The tags may also be re-ordered within a Pane using the Up and Down arrow buttons in the Pane toolbar.
- Options - You may set options on Tags or on Choices by clicking on them in a Tag Profiles Tag Pane.
-
Tag Options:
-
Selection Required: A choice must be made for this tag for coding to be completed. Reveal will not move to the next document until the selection is made for this tag.
-
-
Choice Options:
-
Is Default: It may be desirable in a review to pre-set a default and have reviewed only code exceptions. In such cases you may set the Is Default attribute to one or more Tag Choices. Is Default status is set by clicking on a Tag Choice once it is in a Tag Profile Pane.
-
Reviewed Status: In most document reviews, tags are used not only to categorize documents, but also to determine the review status of a document. Reviewed Status is set by clicking on a Tag Choice once it is in a Tag Profile Pane. For example, in a review for responsiveness, all documents with either a ‘Non-Responsive’ or a ‘Responsive’ tag are considered ‘reviewed’ and review complete. Reviewed status can also be associated with a Privilege tag. If selected, coding this tag will be reflected in the Reviewed Workflow filter added to the April 2024 release.
-
-
- Clicking Collapse All at the top of the Tag Profiles panel will collapse the tags only, the panes will remain visible.
Keyboard Shortcuts
Users can define keyboard shortcuts and associate them with any tag pane to make it easier for reviewers to apply common coding. The two-key shortcut can save the time required to position the pointer to click one or more tags in the pane while reviewing a document or apply the same tag to sequences of documents.
Note that the same shortcut key sequence may be defined for more than one Tag.
To define a shortcut:
- Click on the keyboard icon within a tag pane.
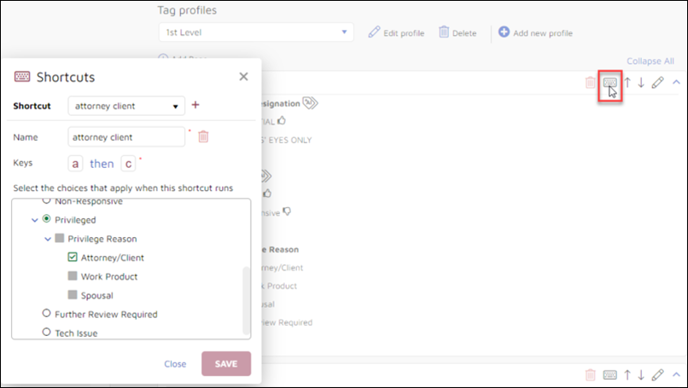
- If no shortcuts have been defined for this profile yet, you will see << New Shortcut >> in the Shortcut box, or if prior shortcuts have been defined, click the plus sign ('+') to the right of the Shortcut.
- Provide a descriptive Name.
- Enter the Keys to be used in the shortcut sequence; using characters derived from the initials of the name is recommended. In the example below, entering f followed by d triggers the Finance Doc shortcut, which will set the Finance choice under Issues and turn off Administrative and HR and leave Legal.
- Select the choices to be applied when the shortcut runs. In a mutually exclusive tag only one choice can be set to select. In a multi-select or tree tag shortcut definition the following settings may be toggled for each choice:
- Grey box - do not change value of choice, leave as-is.
- Checkmark - select this choice when shortcut is activated.
- [X] - deselect this choice when the shortcut is activated.
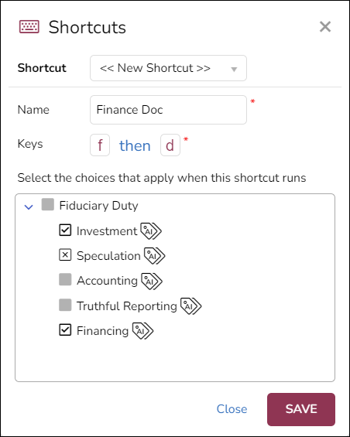
- Click SAVE when done, then Close.
-
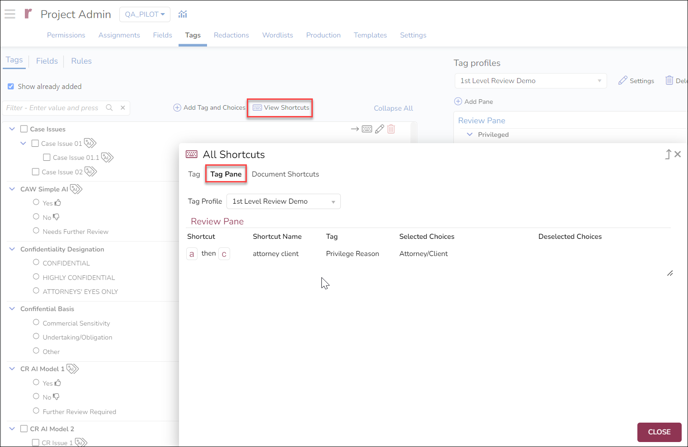
To see a list of all shortcuts, in the Tags screen:
-
Click the View Shortcuts button above the left side Add Tags and Choice panel.
-
You may choose to list only shortcuts defined for the current tag or for the tag pane in the selected Tag Profile.
-
While reviewing a document in the document review Viewer screen, you can press ? in order to bring up this shortcut summary window.
-
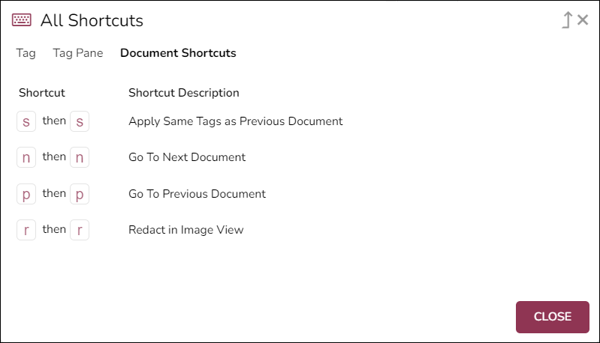
There are several built-in Document Shortcuts that are always active:
s,s Apply Same Tags as Previous Document
n,n Go To Next Document
p,p Go To Previous Document
r,r Redact in Image View
-
Note that the same shortcut key sequence may be defined for more than one Tag.
Last Updated 4/30/2024