
This article provides both written and visual instructions for adding a classifier as an AI Model to the AI Model Library
A classifier can be published to the AI Model Library for use in other projects. The classifier, once trained as a project model, can offer a starting point for analysis of a new project having similar characteristics.
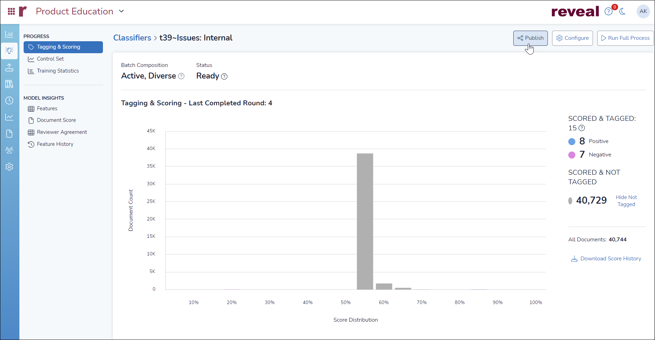
Publishing a model starts under the Supervised Learning section by opening View Details on the selected classifier card. Click Publish in the upper right of the screen.
- Open Supervised Learning from the Navigation Bar.
- Select (or Find) the fully trained classifier that you wish to publish.
- Click View Details on the selected classifier card.
- Click Publish in the upper right of the screen. If insufficient examples have been tagged positive and negative, or if the rounds were started before the implementation of the Features analytics set out below, you will be prompted to take appropriate action (e.g., further coding or using Run Full Process).
NOTE: By default you need to have at least 4 positive samples and 1 negative sample in order to publish the model automatically; 1 positive sample and 1 negative sample are sufficient to publish, but the more coded samples provided, the better the model. - Enter the Title and Description for the model and click Publish to start the model generating process.
- In the Features section, if the default Use Features from Classifier As-Is is selected, nothing further is required before clicking on PUBLISH.
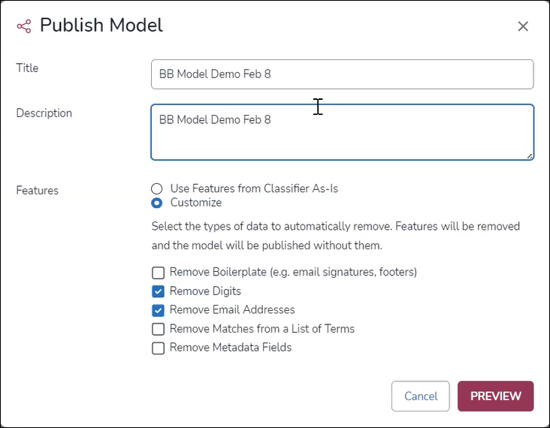
- Selecting Customize adds selections to analyze classifier features to automatically remove selected types of information. All instances of each feature selected will be removed from the published model; no further selection is available within each at this time. The Features are:
- Remove Boilerplate (e.g., email signatures, footers)
- Remove Digits (selected by default)
- Remove Email Addresses (selected by default)
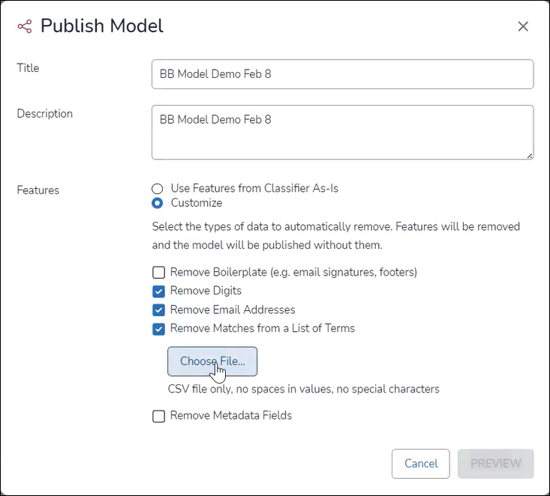
- Remove Matches from a List of Terms (a button appears to choose a CSV file)
- Remove Metadata Fields.
- With Customize selected, the PUBLISH button changes to PREVIEW in order to show a sample of the elements to be cleaned from the published model.
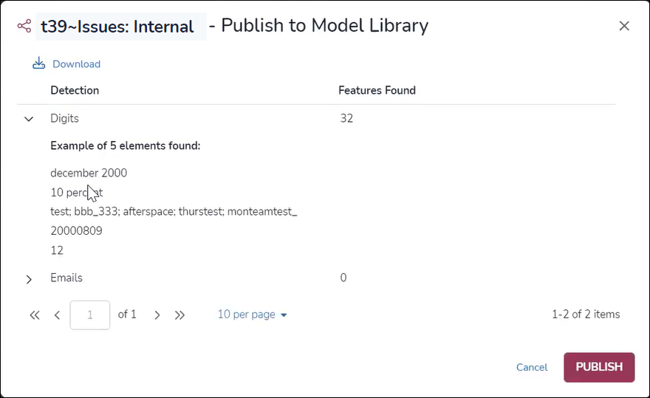
- Click the right angle bracket (>) to expand to show examples for each feature. You also have the option to Download this report. If you approve of the sample of feature items detected, click PUBLISH. Otherwise, Cancel to return to the Publish Model screen to modify the Features Customize selections.
- In the Features section, if the default Use Features from Classifier As-Is is selected, nothing further is required before clicking on PUBLISH.
- When Publish is clicked, there will be a green-framed notice at the top center of the screen notifying you that <Model Name> was successfully published.
- The model will appear as a card in the Model Library, from which it can be downloaded in the encrypted NPS format, after a period of back-end packaging.
Last Updated 2/21/2024