
This article provides a detailed description of the of all the features and options associated with the Communications Map.
Communications is a feature that provides you with an at-a-glance understanding of the communication patterns within your project data. This allows users to view and analyze thousands of messages quickly, which is helpful when tracking the flow of information throughout an organization. With a few clicks, users can arrange clusters of messages, examine and update alias email addresses for communicators, and readily view the frequency and other attributes of messaging between them.
This article will focus on how the Communications visualization can be used in combination with searching or metadata filters to zero in on specific conversations, topics, and individuals.
Communications Data Visualization Elements
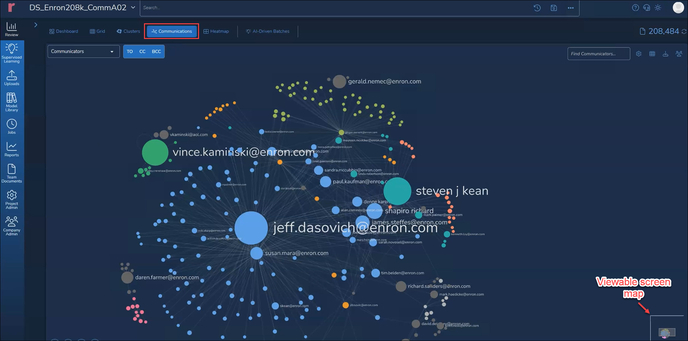
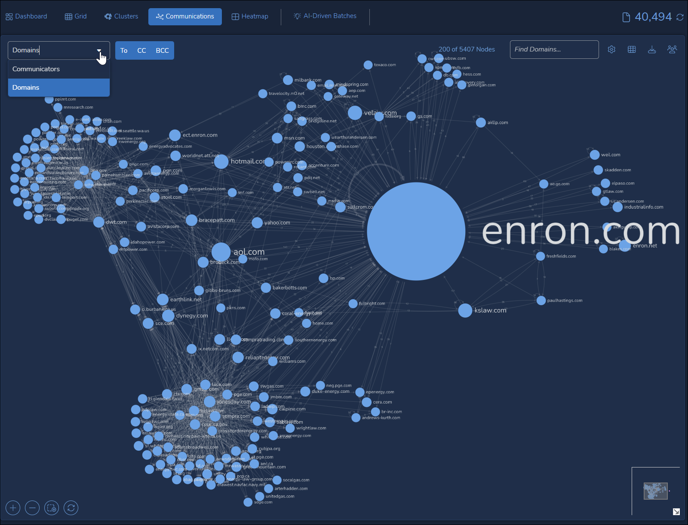
The Communications visualization displays email communicators for either the entire project data set or the current search as Nodes linked by communications between the nodes. Each node represents an email address, which may be collected with other alias email addresses under a Communicator (e.g., Jeff.Dasovich@enron.com, jdasovich@enron.com, dasovichj@aol.com). You may also elect to view communications among Domains, chosen from a drop-down list below Communicators.
Communications applies similar colors to nodes that are in frequent communication with each other. You may click a single node to view details regarding email activity such as the total number of documents and the number Sent and Received for this node, and to (a) search for the node and related aliases in the visualization, (b) view the list of aliases, and (c) edit the node’s Communicator to add or remove aliases. More information (Communicated Most with) appears on the card as of Reveal 2024.2 (February 2024 Release) below. The initial list of aliases for a given Communicator is generated by a Reveal AI pipeline process, which may then be updated by permitted reviewers. The controls for each of these processes are displayed at the bottom left corner of the Node Details card.
Node Details...

(as of Reveal 2024.2)
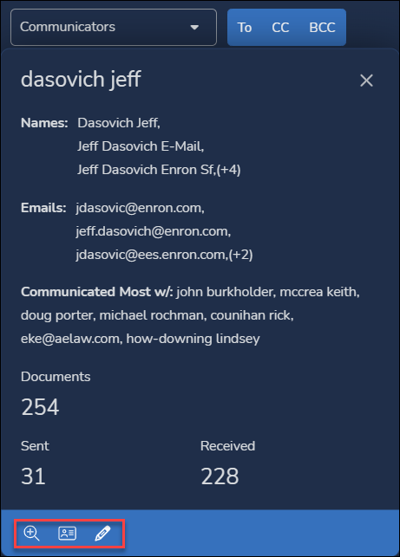
- Add to Search creates a search pill in the search bar for this Communicator. Searching on the Communicator will also retrieve all of its alias email addresses. This control is also found in the cards for communication links and multi-node selections.
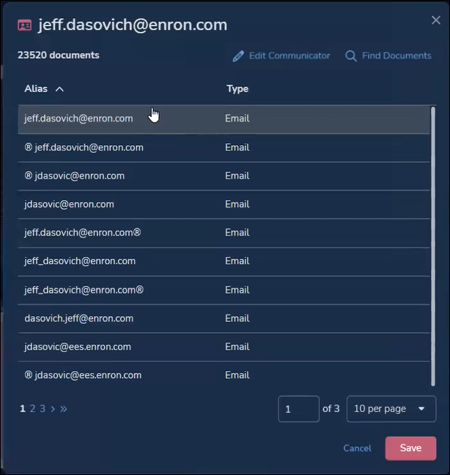
- Aliases lists all current aliases for the node’s Communicator. You may elect to run Find from here for a selected alias, or (if permitted by your Reveal role) Edit Communicator to add a missing email address or remove one that may be unrelated. At this time, all aliases will be of the type Email.
- Edit Communicator is where email addresses may be searched and added to or removed from the Communicator persona, which itself may be renamed (from the so-called master alias email address) for easier identification.

- Name – The label for the Communicator is taken from the initial ‘master alias’ in the list. This may be changed here.
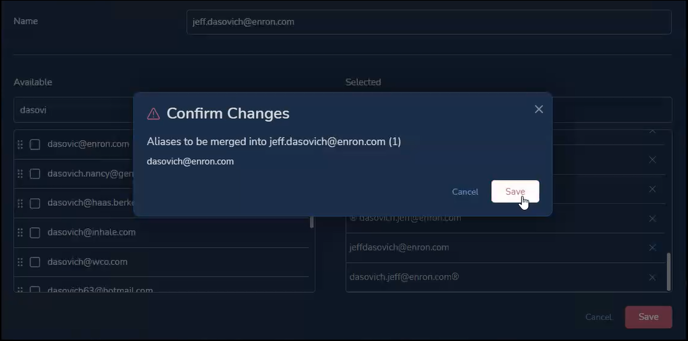
- Project-wide Aliases – The list of unassigned email addresses may be searched from the box atop the left-hand column. There items may be selected to be added by clicking the single rightward arrow in the center of the screen, or checking boxes for available email addresses and clicking the double rightward arrow in the center, or by dragging and dropping entries into the Selected list.
- Assigned To This Communicator - The list of already assigned and newly-added email addresses may be searched from the box atop the left-hand column. There items may be selected to be removed by clicking the [x] at the right of unwanted entries; these will be displayed with strikeover lines until you (a) click the Save button or (b) click the Cancel button or X in the upper right corner to close the screen without saving. When you click Save to add or remove alias entries or change the Communicator name, an additional Confirm Changes dialog box will require that you click Save to approve the change.
When the edits are saved and confirmed you will be returned to the Communications screen with the Node Details card open and updated. There will be a message displayed stating that there are pending updates to the graph itself as the aliases are incorporated into the Communicator persona.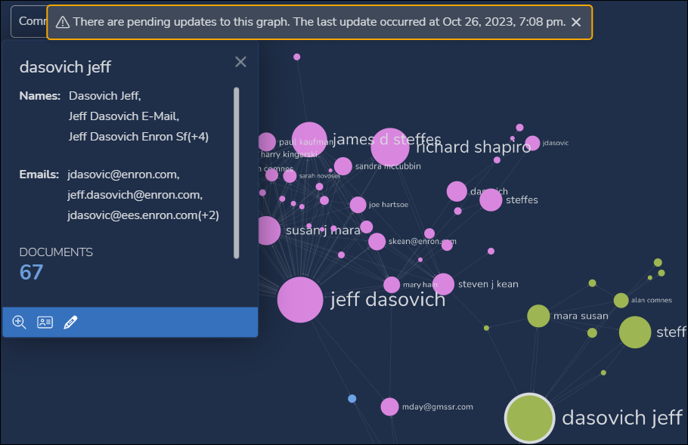
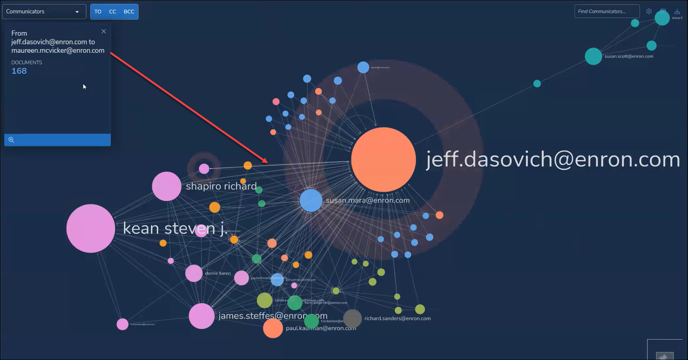
Communication Links
Click on the communications line between Nodes to open a card reporting the number of documents in the selected communication set.
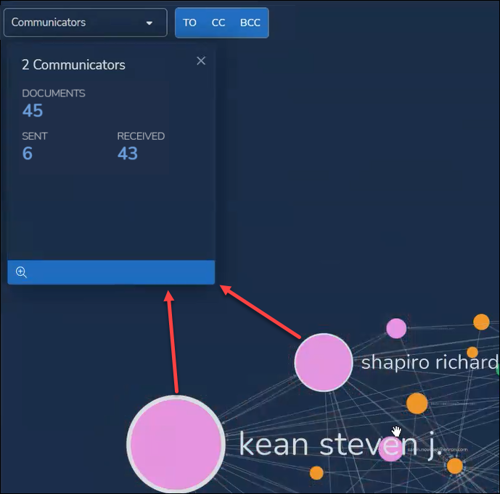
You may also select multiple Nodes using CTRL-Click to summarize communications between them, or select by dragging a box around a cluster of nodes that you wish to examine.
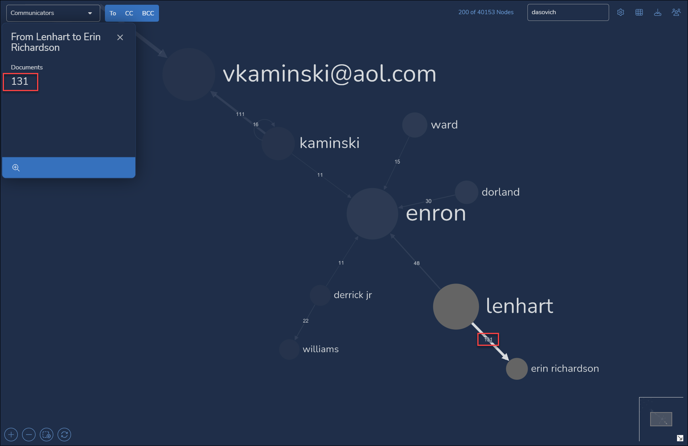
As of the February 2024 release, the number of messages in a link between two nodes is shown on the link itself.
Domains View
As of Reveal 2024, you may click the Communicators drop-down box and select Domains. This will enable you to examine communications traffic at an enterprise level.
Searching Communications
As with other data visualizations in Reveal, Communications will both reflect conversations found in a current search when opened and create a search pill when added as a filter. This section will discuss features of searching in Communications.
Opening a Communicators Search
As noted above, clicking on the magnifying glass+ icon in a Node, a link or multiple Nodes will add a pill to the search bar containing the prefix Communicator:. Clicking on the pill to open it in Advanced Search will show the format Communicator: <Persona> (## aliases, Recipient or Sender).
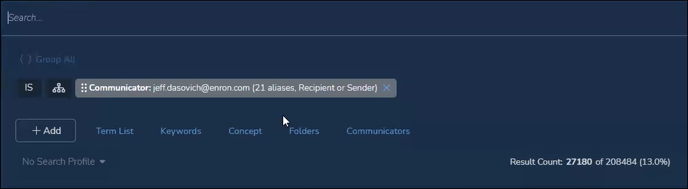
If you have not already added a Communicator search from the Communications visualization, note that you may add one from the search builder’s new Communicators item found at the right of the search builder main menu or under +Add > Common > Communicators. The search pill in the illustration above would open in this same Communicator search screen:
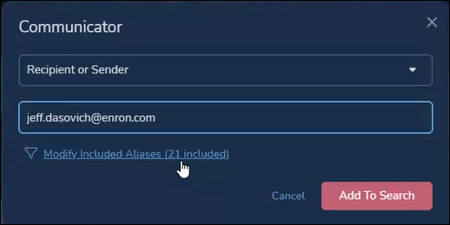
- Specify type of communicator being sought:
- Recipient
- Sender
- Recipient or Sender
- Enter as much of the Communicator name as is known; this will retrieve all alias email addresses associated with that Communicator.
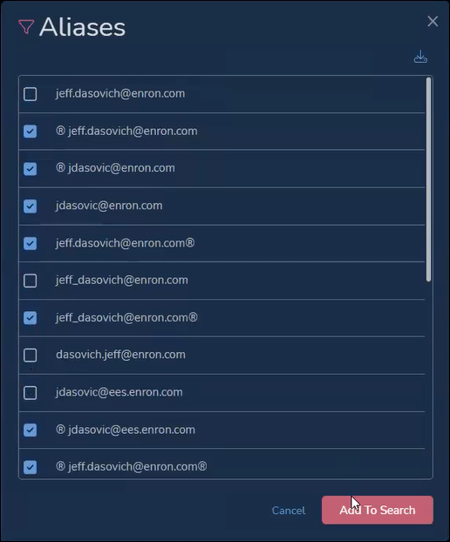
- Search allows you to Modify included Aliases (## included) for purposes of the search; selections here will not be saved to the Communicator itself. To remove one or more aliases from the search, uncheck and click Add to Search.
As with any search, more conditions may be added, and the search itself named and saved to a search folder.
Configuring Communications
This section discusses the settings found in Communications and how to use them while exploring your results. The panel below is found in the upper right corner of the screen:

- Find Communicators – Locate one or more Communicator or email address in the visualization by entering text in this box.
- Settings – Configure the level of detail and other factors in the Communications screen.
- Communicators Data – A pop-up table of data organized from the top communicators on the current visualization.
- Export Graph – Export the Communications graph as an image.
- Communicators – List all Communicators in the graph. Can edit individually, or select multiple Communicators to merge. .
Settings
Customize your view of the communication chart by selecting the settings gear icon just to the right of the Find Communicators box.
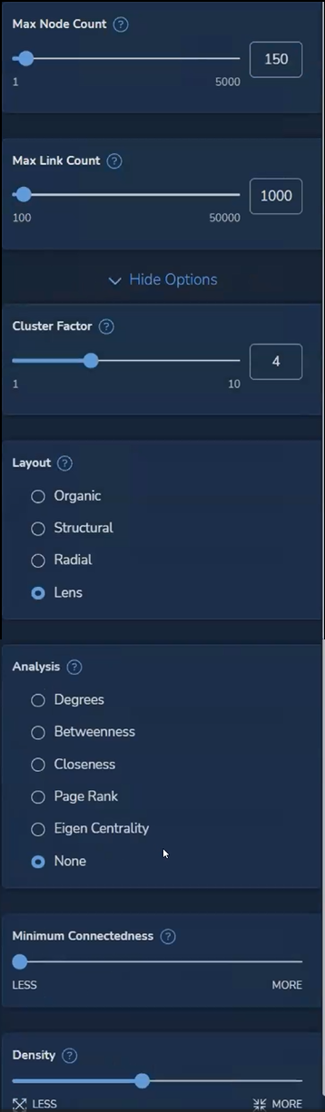
A panel will open at the right of the screen, initially containing three items, plus a toggle to open the Advanced Settings panes below. The defaults balance detail and visibility. Any changes will be retained for the User’s subsequent sessions. All items have help buttons (?) to explain the settings; all changes can be rolled back by clicking Reset Options at the bottom of the options pane.
- Max Node Count – Adjust the maximum number of Nodes that appear on the Communication chart from the default of 100. Decrease to limit the display to the top communicators (g., 50). Increase to add communicators, at the cost of possibly excessive display density.
- Max Link Count – Adjust the maximum number of Links that appear on the Communication chart from the default of 1000. Decrease to limit the display to links with fewer overall communications. Increase to raise the link ceiling, at the cost of possibly including blast email traffic.
Advanced Settings
Clicking Advanced Settings opens the following additional options, which are intended only for advanced users. As with standard Settings, any changes will be retained for the User’s subsequent sessions. See the onscreen Help (?) items for deeper explanations of each setting.
- Cluster Factor – Set minimum nodes for color clustering.
- Layout – Organize node layouts using different properties and methods.
- Analysis – Apply different communications analytics tools to emphasis aspects of the links between nodes.
- Minimum Connectedness – Adjust for fewer or more links required for nodes to appear to see nodes with more connectedness to each other.
- Density - Adjust the distance between the nodes. This is useful for clearing overlaps.
All settings may be Reset to Default with a click of the button at bottom of this panel.
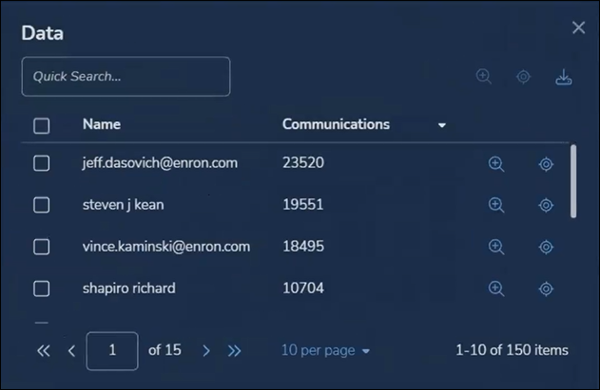
Communications Data
A table of the data underlying the Communications Visualization, showing the Communicator Name and number of Communications, with buttons to add each to a search or locate the node in the graph. Nodes may be searched and selected in the paged table, and the table may be exported to CSV format.
TO/CC/BCC
A set of three buttons at the upper left of the Communications screen toggle to filter whether a specific Communicator or any alias was included in the TO, CC or BCC field. All are ON by default.
Last Updated 2/16/2024