
This article provides both visual and written instructions for running a production job.
Non-Audio Video Tutorial
Once the production job has been created, preprocessing has run and errors have been managed, choose the dropdown arrow next to the production job and choose the option to Start Full Processing – Imaging and Stamping.
With the deployment of Reveal 11.9, updates will be implemented without interrupting running production jobs. This will facilitate continuous improvement of Reveal without impact on workflow.
- Log in to Reveal as an Administrator or Client Administrator.
- Open the project from the Project Hub.
- Click Admin and open Production.
- Create a Production Job as described in How to Create a Production Job.
- Select the dropdown arrow next to your new Production Job and choose Start Full Processing - Imaging and Stamping. You will be asked to confirm on start.
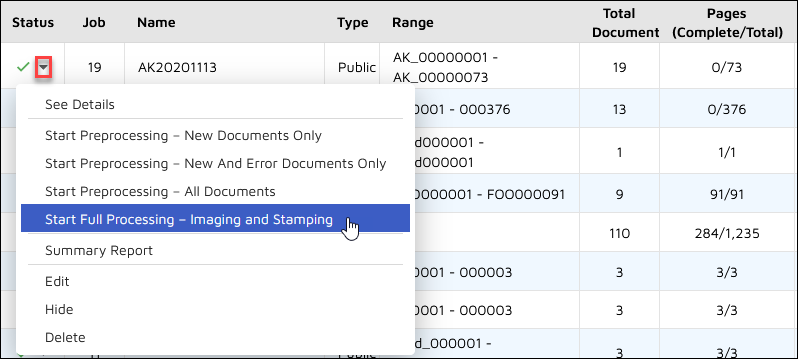
- Once the job is started a grey gear will appear in the Status column. The gear will turn green and spin while the job is processing.
- When the production is complete, the Status icon for the production job becomes a green check mark. A Production Summary Report is available from the Status dropdown menu.
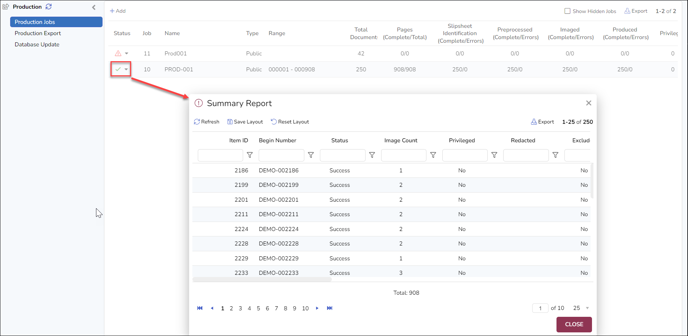
- This report may be downloaded as an Excel spreadsheet or to PDF to further examine any redacted or excluded documents and the Exclusion Category applied to each.

- You may add fields to the Field Profile in your Grid to see the Production Jobs and other production information associated with any document record in the table.
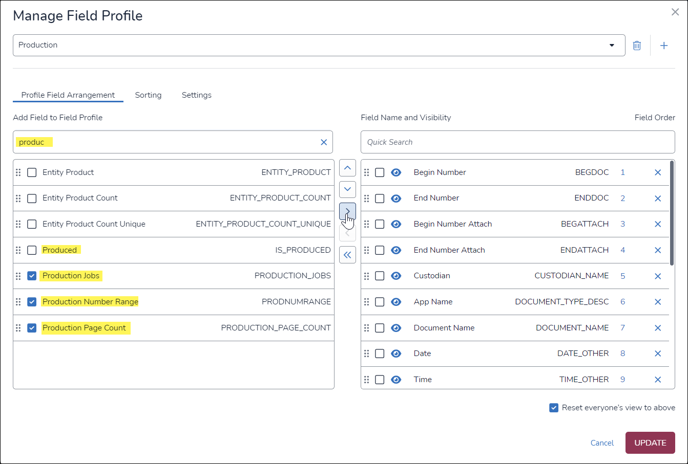
- With the Grid view selected, click the Field Profile button at the upper right of the Grid.
- Select the Field Profile to be displayed.
- By filtering using produc we can see and select the Production Job field and associated information to add them to the Profile display and position the column order.
- The production status, job, number range and page count will be displayed in the Grid.
- You are now ready to export your production job.
Last Updated 1/09/2024