
This article provides both visual and written instructions for managing field properties and creating search profiles.
Non-Audio Video Tutorial
Fields are discrete items of data (including metadata) which taken together constitute a record; in Reveal these fields store information about the project's documents and are managed from the Fields tab under Project Admin. To manage fields:
- Login to Reveal as an Administrator.
- Click Project Admin in the toolbar at left.
- Project Admin will open in a new window.
- Select Fields. This will open to the Field Profiles tab.
- The other tabs - Search Profiles, Modify Fields and Add Fields - are discussed below.
Field Profiles
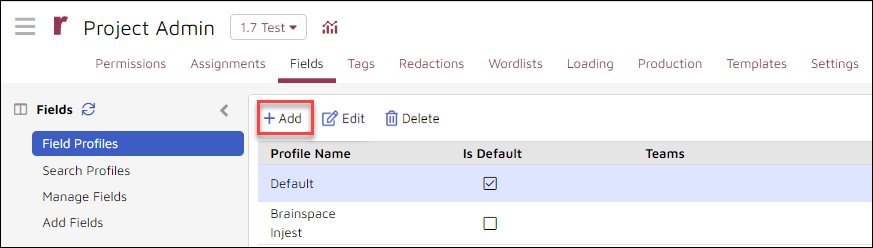
Field Profiles individually define a list of fields and their display and sort order for assignment to Teams. When a project is first created, a Default Field Profile is automatically created to include a set of standard fields available in the database.
This Field Profile is assigned to all users unless a different profile is explicitly assigned. A project may only have one Default Field Profile, and the project manager can specify which fields should be present (and their order of presentation) in the Default Field Profile. Other field profiles might be used for second level review, privilege review, contract reviewers, or any level of review that would need to see different fields displayed.
To create a field profile:
- In the Field Profiles tab under Fields, click +Add.
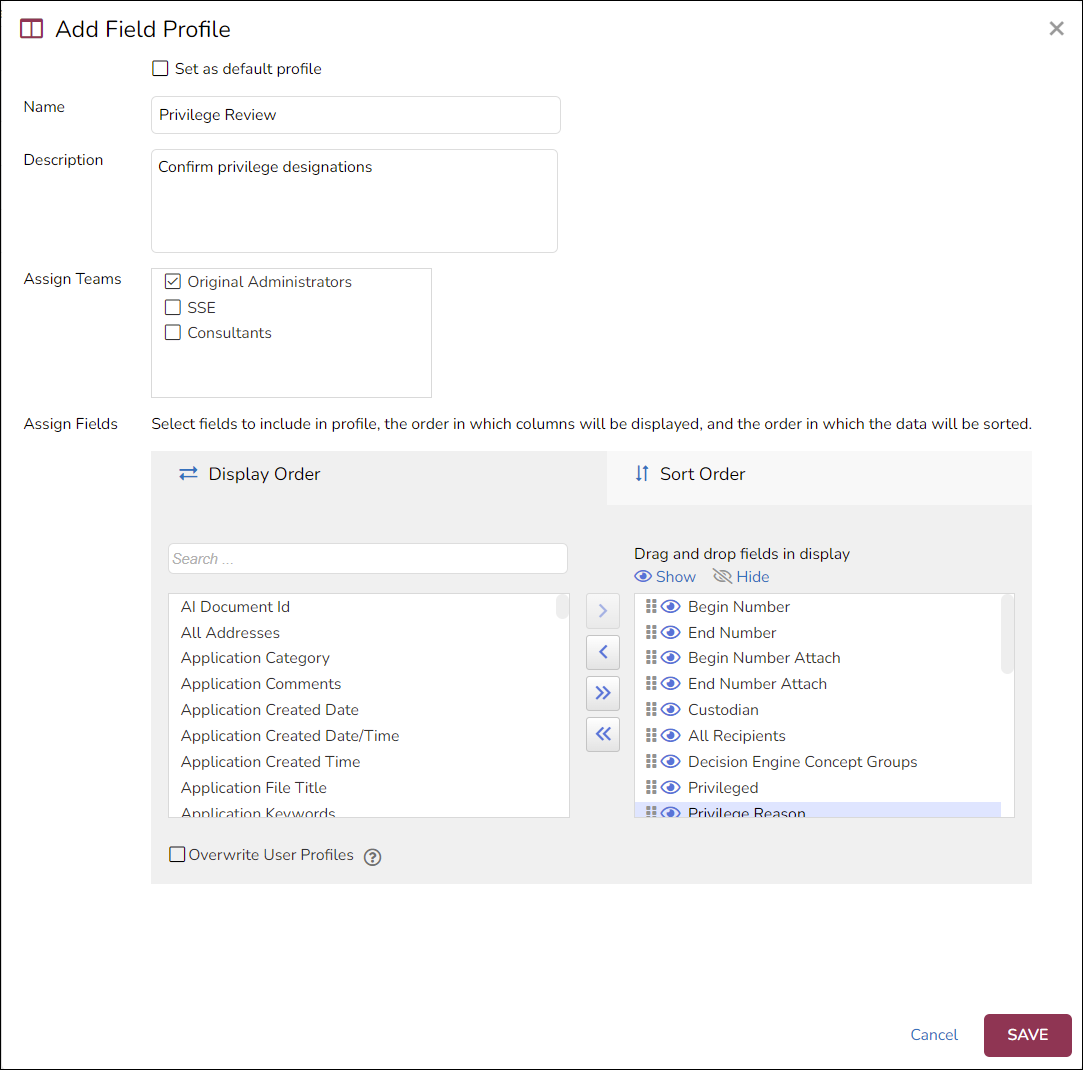
- In Add Field Profile, you may first elect to set this profile as the default.
- Enter a readily-understandable Name.
- You may enter an optional Description of the intended purpose of this profile.
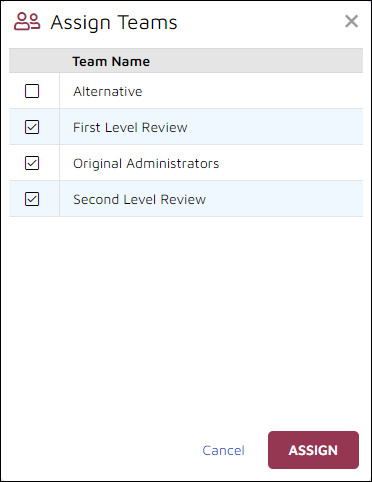
- Assign Teams which will be able to access this field profile.
- Assign Fields is where fields are assigned in specified order to the profile and the Sort Order is set.
- In the Display Order tab, either drag and drop or select and right arrow [>] fields from the list of all available fields at left to the Profile Fields at right. (Clicking the [>>] button will move all fields to the profile list and is not recommended.) Fields may also be removed from the profile by dragging and dropping from right to left or clicking the left arrow [<] button.
- Once fields are in the profile list, they may be positioned in order by grabbing the handle at left of the field label and dragging up or down.
- Click the 'eye' icon to set whether the field is displayed (blue eye) or hidden (grey eye with slash) by default in the profile.
- Sort Order is the second tab under Assign Fields where a field or fields in the profile is place to the right side to determine the default sort order of the profile. The first field listed is the primary sort, and the second field if specified is a secondary sort in case of a primary sort field that could yield a tie (such as a date field).
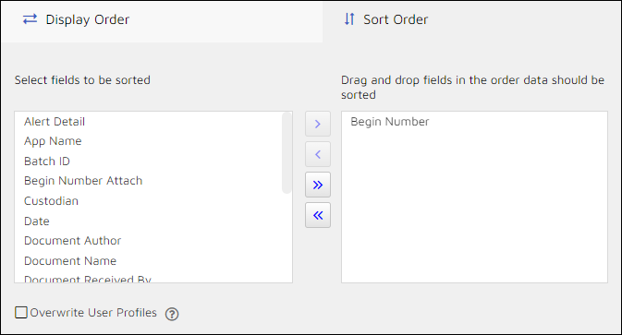
- The Overwrite User Profiles checkbox forces the current profile and all fields removed or added to this profile to all assigned team members.
- Click SAVE.
Metadata Search Profiles
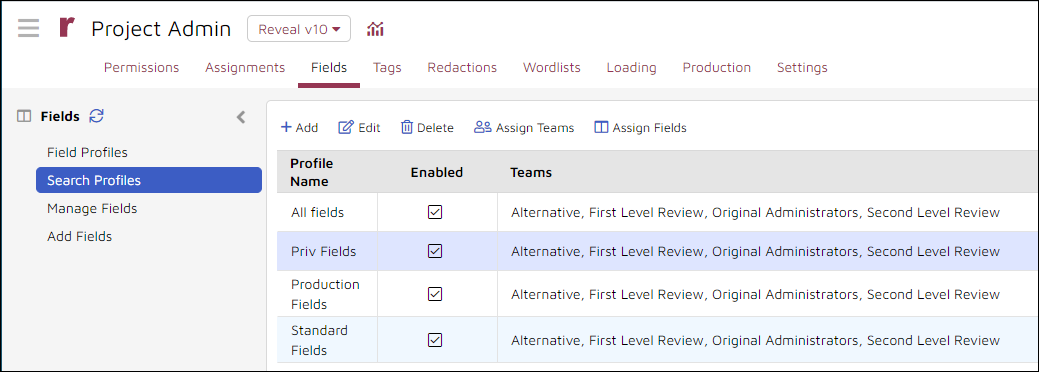
In the screen of the Search Profiles tab you can define custom metadata search profiles which provide options to limit and fine-tune the metadata fields that are queried when running full-text metadata searches.
Using a search profile for searching can potentially perform faster than a standard search broken out with the same metadata criteria. This is because the search profile will only hit the index once while the standard search broken out will hit it once for each criterion used in the query.
- Click Add to create a metadata field profile.
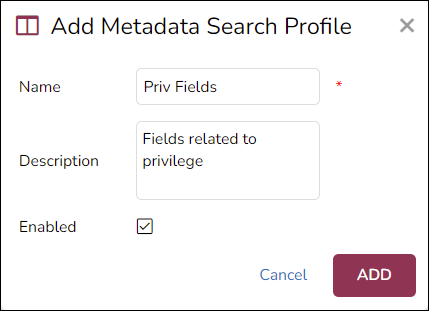
- Enter a Name for the Search Profile (required).
- Add a Description (optional).
- Check Enabled to be able to use this profile.
- Click ADD to save.
- If any changes are required, select the search profile in the table and click Edit.
- Highlight the Search Profile and click Assign Fields to select the metadata fields to be included in searches using this profile; click ASSIGN when done.

- Then Assign Teams to provide access to all Teams that will use this profile.
- Now this metadata search profile is ready for use in reviewing and filtering documents.
- For more details on using Search Profiles, see How to Create and Use Search Profiles.
Manage Fields
.png?quality=high&width=688&name=02%20-%2008%20-%20Manage%20Fields%20(update).png)
-
Name: Is the field name as stored in the back end of the database. It is also known as field table name, and cannot be changed.
-
Description: Allows the Administrator to optionally type in a more detailed description of the specified field.
-
Field Display Names: Is the column header that the users can see in the Grid list. It too cannot be edited, and by default will display the name only in the language or languages currently active for the Reveal system.
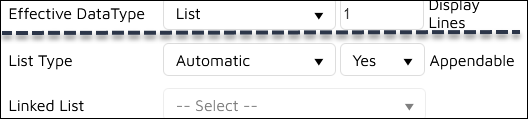
- Effective Data Type: Shows how data has been formatted to display within the project. This cannot be changed in the Project Admin > Fields user interface once the field is created. The one change permitted here is to set a field to work with a pre-defined drop-down list by selecting the List data type (see item 15 below). Definitions of the data types are set forth under Add Fields > Field Data Type below.
-
Display Lines: Set the number of display lines for a field. NOTE: This field is editable only if the max length is 101 or higher for an Effective Data Type for Text.
- Max Length: Is the value for how many characters can fit within a field. This value is only active for field types where length may be configured (such as Decimal, Integer, Numeric and Text). NOTE: Once a field is created, you cannot change this configuration. If you need to change the max length, you need to create a new field with the updated configuration.
- Native Document Field: Denotes whether field specifies a native document location.
- Document Number Field: Marks this field as an identifier to allow the field to be displayed in the Production Database Update screen and for use as a key Field in image loading. Enables searching for the field content as a Document ID in search functions.
- Required: Is a Boolean True/False value that determines whether the field is required in the database. This will affect Validation settings.
- Initially Visible: Is a Boolean True/False value that determines whether a field will be visible to users when they first log in to the project. Default is usually Yes.
- Updatable: Allows a field to be edited in the review module, used where a project specifies the coding of certain document fields directly within Reveal. There are required and system fields that cannot be set to updatable. Administrators should carefully consider making a field editable as it will allow users to directly alter the data in the database. It is strongly encouraged that only custom or user-added fields permit updating (see Add Fields below).
- Multi-Value: Is for fields containing multiple values within the field.
- Is Relational Field: This is used to create a custom relationship field for linking specific data. Documents having the same value entered into a defined Relational Field will show an additional relational panel to Duplicates, Near Duplicates, Family Members and Email Threads in the Viewer screen. Note the 450 character limitation on maximum length for this field type.
-
List Type: If the Effective Data Type is set at List, select from Automatic or Managed List Type, and determine whether or not values in the list should be Appendable.
-
Linked List: Select a set of values available for fields that have List as their Effective Data Type and a List Type of Manual. Lists are created and specified in Review Manager.
- Is Transcript Lookup may be set after creating a field for this type of Text document.
- Decimal Scale specifies the number of decimal places within the Max Length of a Numeric field; this value cannot be changed once the field is created. If you need to change the decimal scale, you need to create a new field with the updated configuration.
- Click UPDATE when done.
Add Fields
An Administrator may add custom fields of any type here, entering information similar to that presented by Modify Fields (see above). The option to Import Field will be discussed below.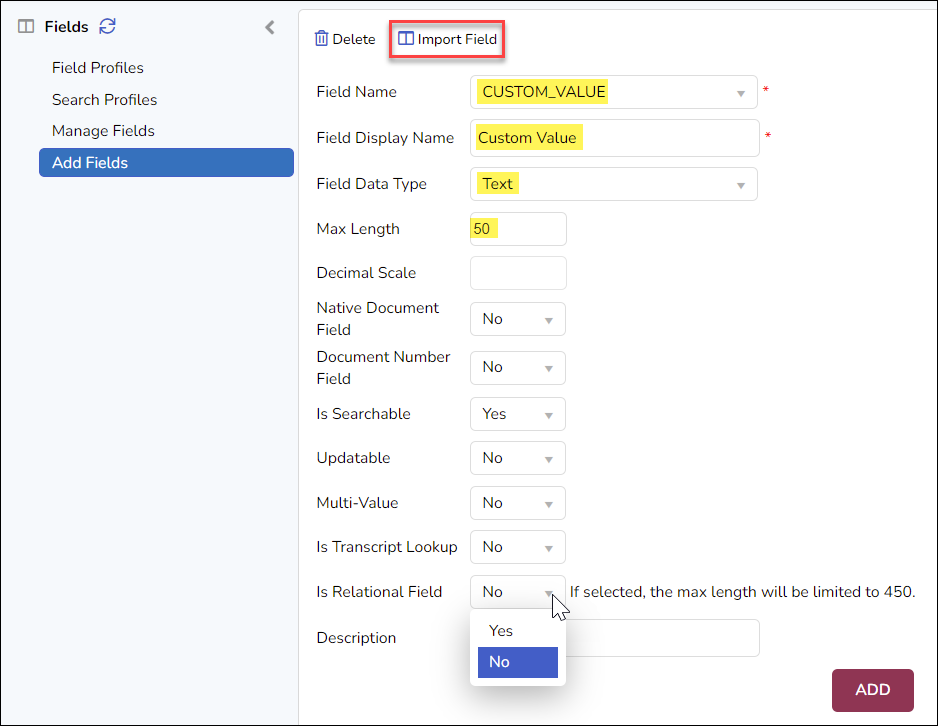
-
Field Name: Is the field name as stored in the back end of the database. This name may contain underscore characters but no spaces. The greyed-out drop-down arrow is used for the Import Field option discussed in item 14.d below.
- Field Display Name: Is the column header that the users can see in the Grid list. This name should match the Field Name except that it may contain spaces.
-
Field Data Type: Set how data is displayed within Reveal; this cannot be changed in the Project Admin > Fields user interface once the field is created. This setting is most commonly adjusted in dealing with date fields in Review Manager, where a full index can be run following any such change. NOTE that List is not an initial option but may be added using Modify Fields. The available options are:
- Boolean - Logical 0/1 or Yes/No.
- Date - Contains a date formatted for the selected region of the Reveal instance.
- Date time - Contains formatted values for <date> <time>.
- Decimal - Provides an exact numeric value in which the precision and scale can be arbitrarily sized. You can specify the precision (the total number of digits, both to the left and the right of the decimal point) and the scale (the number of digits of the fractional component). Source: https://docs.oracle.com/javadb/10.6.2.1/ref/rrefsqlj15260.html.
- Float - A floating-point number is typically expressed in the scientific notation, with a fraction (F), and an exponent (E) of a certain radix (r), in the form of F×r^E, representing a very large value (e.g., 1.23×10^88) or a very small value (e.g., 1.23×10^-88), positive or negative depending upon the fraction supplied. In summary, Float stores an approximate value (scientific calculations, for example), while Decimal stores an exact value (like money). Source: Chua Hock-Chuan, A Tutorial on Data Representation (Nanyang Technological University, Singapore).
- Integer - Integers are whole numbers or fixed-point numbers with the radix (decimal) point fixed after the least-significant bit.
- Numeric - A data field that holds only numbers to be calculated.
- Text - Alphanumeric data, not highly formatted.
- Time - Contains formatted value for time of day.
See also How to Create Pick List Fields.
- Max Length: Specifies the value for how many characters can fit within a field, and is only active for field types where length may be configured (such as Decimal, Integer, Numeric and Text). NOTE: Once a field is created, you cannot change this configuration. If you need to change the max length, you need to create a new field with the updated configuration. NOTE: If you want to be able to change the number of display lines for the field, you must set the max length to 101 characters or more.
- Decimal Scale: Combines with Max Length to specify how many decimal places will be allotted to a Decimal Field Data Type; this value cannot be changed once the field is created. If you need to change the decimal scale, you need to create a new field with the updated configuration.
- Native Document Field: Denotes whether field specifies a native document location.
- Document Number Field: Marks this field as an identifier to allow the field to be displayed in the Production Database Update screen and for use as a key Field in image loading. Enables searching for the field content as a Document ID in search functions.
- Is Searchable: Indexes this custom data field for search. Default is Yes.
- Updatable: Allows a field to be edited in the review module, used where a project specifies the coding of certain document fields directly within Reveal, usually only for custom or user-added fields.
- Multi-Value: Is for fields containing multiple values within the field.
- Is Transcript Lookup: Field used to store location vectors for transcripts.
- Is Relational Field: This is used to create a custom relationship field for linking specific data. Documents having the same value entered into a defined Relational Field will show an additional relational panel to Duplicates, Near Duplicates, Family Members and Email Threads in the Viewer screen. Note the 450 character limitation on maximum length for this field type.
- Description: Allows the Administrator to optionally type in a more detailed description of this custom field.
- Import Field: This button at the top of the Add Fields form opens a pop-up window where you may specify adding one or more fields from a delimited file:
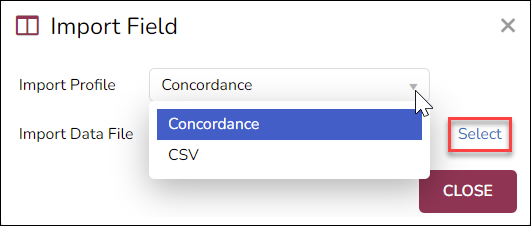
- Import Profile: Specify the delimited file format, whether Concordance DAT or CSV as a standard (see Review Manager discussion of Importing Documents).
- Import Data File: Browse to the file containing the delimited field values to be added.
- Click CLOSE when done.
-
Once the file is located, the Field or Fields can be created using the drop-down menu in Field Name. As you create the fields, the fields that were already imported will no longer be available in the list.
-
Continue the set up for the field based on the desired settings for Field Type, Max Length, etc.
-
Click ADD when done.
Field Notes
Two noteworthy field updates arrived with Reveal 11.4:
- New Processed Date and Sender Recipient Domains fields have been added to the default project field template.
- Processed Date provides a record of when each dataset was added to the project for reporting purposes.
- Sender Recipient Domains facilitates populating the Sender-Recipient data visualization.
- Field Name Validation during data import monitors new data, and particularly custom fields, to assure that added fields do not have the same name as standard Reveal metadata fields. Conflicting names will bring up a prompt to rename the new field.
For more information about managing fields in Review Manager, see Managing Fields.
As of Reveal 2024.3, fields not accessible to a user through field profile team membership will be unavailable for search and will not appear in Dashboard data visualization options. Company and instance administrators will not require explicit permission for all field access. Otherwise, unless a user’s role includes the Search > Allow All Field/Tag Access for Search permission shown below, the user will be unable to search or filter on a field’s data.
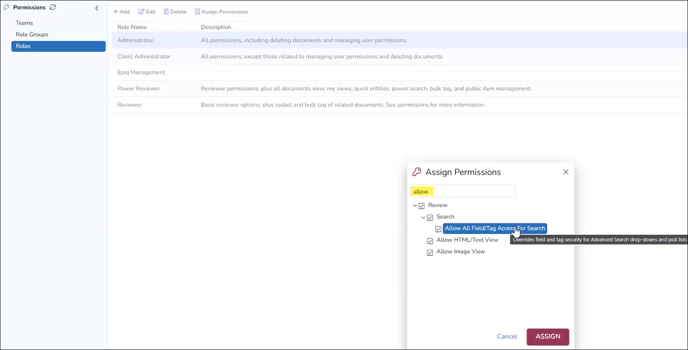
Users whose role does not include this permission will have access to fields permitted in all the profiles to which the user’s team memberships provide access. Should a user not be assigned to a team, that user will have access only to the Default field profile.
Last Updated 3/18/2024