
Steps and illustrations on managing a Reveal project.
Non-Audio Video Tutorial
A Project is the Reveal case database and its related files and resources. Here are some steps to managing a project after it has been created.
- Log in to Reveal as an Administrator.
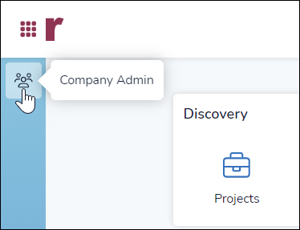
- Select Company Admin either from the Projects landing page or from the Navigation Bar within a Reveal project. You may also select Projects from the Discovery administration box.
- Company Admin will open to the Projects screen, listing current projects (here shown in Dark Mode, opened from Company Admin in the Navigation Bar of an existing project). This screen displays:
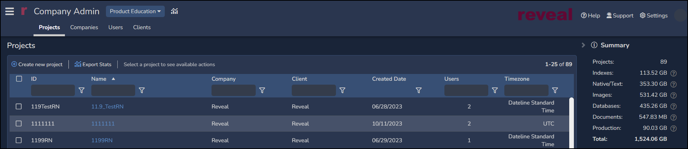
- A toolbar to Create new project or Export Stats, with a prompt to Select a project to see available actions.
- A summary with a count of all projects (or all currently selected projects) and the storage used for Indexes, Native Text, Images, Databases, Documents, Production and Total.
- A list of projects with filterable columns:
- ID - the internal identifier of the project.
- Name - the display name of the project.
- Company - the Company with which the Project is associated.
- Client - the Company’s Client with which the Project is associated.
- Created Date – date on which the project was created.
- Users (count) – the number of users currently assigned to the project.
- Timezone – the fixed time zone set for the project to normalize values in the data.
-
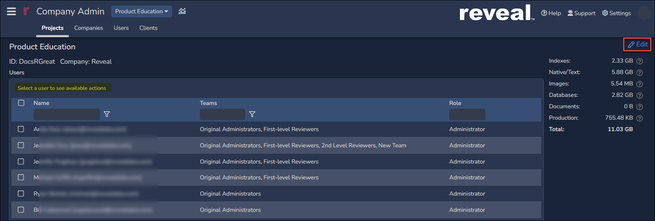
To view and manage a project click on the Project Name in the Projects table. The project details screen shows:
-
the case name at the top with the Case ID and Company in the header;
-
all Users assigned to the case with the assigned Team and Role of each; and
-
summary case statistics in the shaded pane to the right.
-
- In this screen the administrator may:
-
Select a User or Users for deletion from the project (lights up Remove from Project at upper left of Users pane).
- Click Edit in the upper right corner above the Statistics table to open the Edit Project screen. Here you can amend security settings, add Users or change their group assignments. Not all items may be edited after the Project has been created.
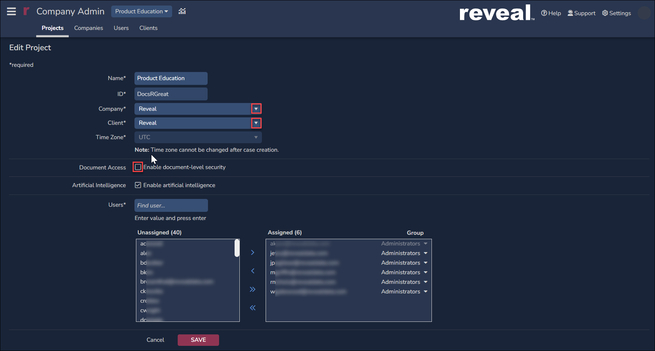
- Name is the display name of the project, which may be amended.
- ID is the internal identifier of the project, which cannot be edited.
- Company selects the Company with which the Project is associated.
- Client selects the Company’s Client with which the Project is associated.
- Time Zone set for the project may be viewed but not changed.
- Document Access sets document level security on or off.
- Artificial Intelligence sets access to AI analysis; this is set ON by default.
- Users is where available users may be assigned to or removed from the project. See How to Manage Users for more information.
- Click SAVE when modifications are complete.
-
Last Updated 1/16/2024