
This article illustrates the process of exporting a set of documents.
Non-Audio Video Tutorial

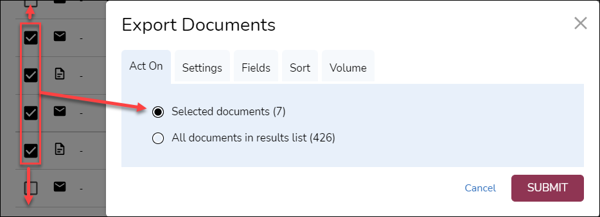
You may Export a set of documents after you have run a search or selected a folder, or after directly selecting documents from the Grid with checkmarks.
With the deployment of Reveal 11.10, updates will be implemented without interrupting running export jobs. This will facilitate continuous improvement of Reveal without impact on workflow.
- Click Export on the Grid Toolbar.
- Act On - Choose Selected documents (if relevant) or All documents in results list.
- Settings -
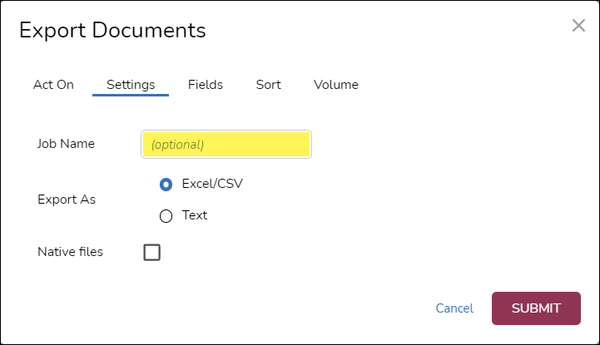
- Set a Job Name for the Export; this is optional but worthwhile for download specification and tracking.
- Choose the format to Export as (Excel/CSV or Text) for selected metadata. If Text is selected, a Profile item appears to specify the type of delimited text to be used; Concordance is the default.
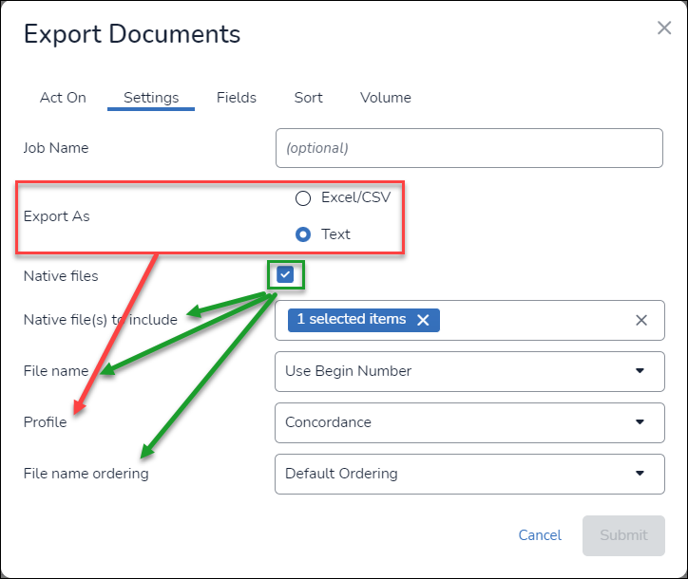
- Check to include Native files in the export. If selected, the following additional options appear:
- Native file(s) to include confirms the selected documents.
- File name specifies the naming convention to use for the exported native file(s):
- Use Begin Number - the document control number.
- Use File Name Field – the file name metadata.
- Use Image Set Bates Number – production set number.
- File name ordering offers choices corresponding to the File Name selection above:
- Default Ordering – by control number.
- Field Value Ordering – by the file name field.
- Prefix Ordering – by production set and numbering.
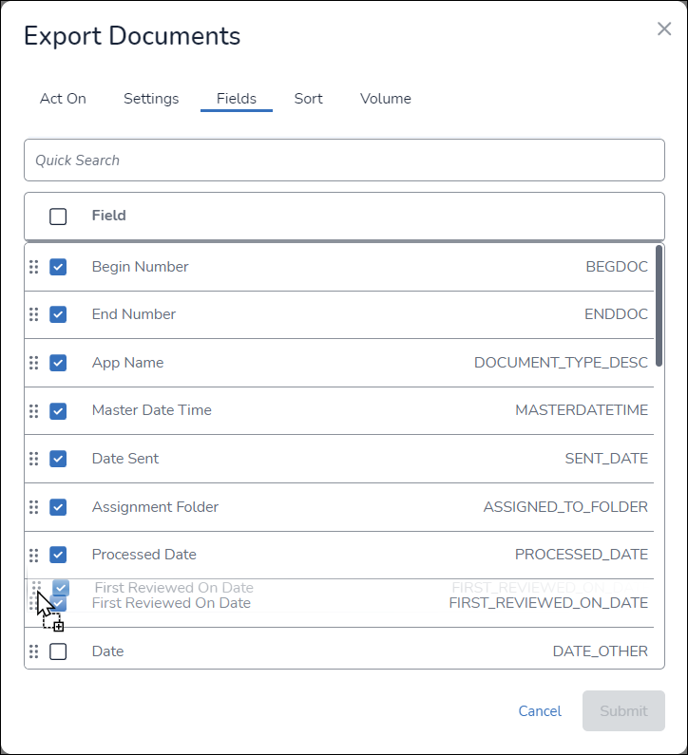
- Fields - Specify the metadata to be present on the export coversheet; all current field profile metadata are selected by default. You may deselect and select fields, and re-order using drag and drop handles at left.
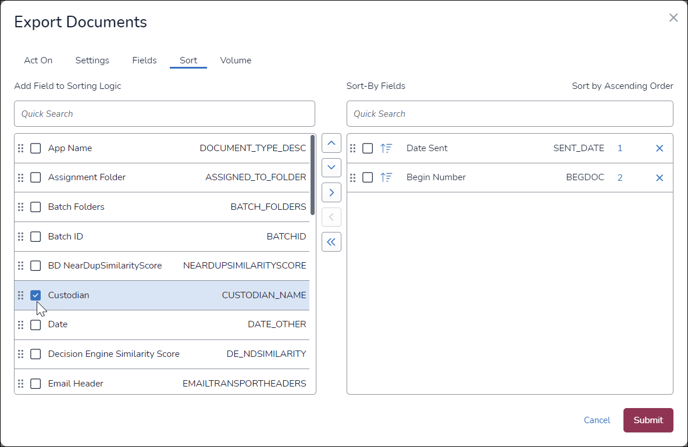
- Sort - Specify the export document sort order field(s); Item ID is the default if no other field is specified.
- You may add a field by selecting the checkbox(es) and clicking the right-pointing arrow button at center, or by using drag and drop handles at left of the field tile.
- Once in the Sort-By-Fields column at right, you may re-order using drag and drop or by editing the sort order number to the right of the field name.
- The sort order of each field is specified by the arrow button between the checkbox and the field name.
- A sort field may be removed by selecting and clicking the left-pointing arrow button at center, or clicking the x at the right of the tile.
- Volume - Adjust the export folder naming and numbering and size, useful in large exports, specifying:
- Prefix – Export folder prefix defaults to Vol.
- Start# - Value of first export folder defaults to 1.
- Number of Digits – Number of digits for export folder numbering; defaults to 2, for folder naming that would start at Vol01.
- Max Size (MB) – 650 is the default, corresponding to the size of a CD if burned to that medium.
- Click Submit to run.
- Act On - Choose Selected documents (if relevant) or All documents in results list.
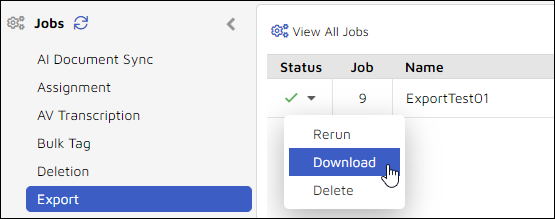
- Results will be displayed in the Export table on the Jobs Management screen.
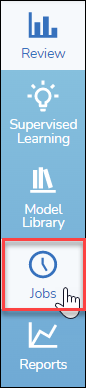
- Click Jobs in the Navigation Pane to open Jobs Management.
- Under Jobs, click Export.
- Click on the Export job status icon (a green checkmark when complete) for the option to Download.
- Click Jobs in the Navigation Pane to open Jobs Management.
NOTE: As of Reveal 11.7, the modal window launched by this action may be moved around the screen by moving the pointer to the top title area; when it becomes a hand, click and move the window as needed.
Last Updated 12/19/2023