
This article provides both visual and written instructions for organizing review layout and workflow.
Non-Audio Video Tutorial
The Review Grid and the Document Review screen contain tools to customize the presentation of data to the preference of the individual user. We will review how to modify each of these spaces.
Customizing the Review Grid
- After logging in to Reveal, open a project.
- Select Review Grid.
- At the right end of the Review Grid toolbar you will find:
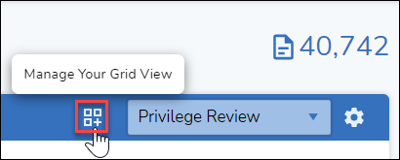
- Manage Your Grid View to adjust the display of fields within the currently-selected Field Profile.
- Field Profile dropdown menu.
- Manage Field Profile to modify the currently-selected Field Profile.
- Open Manage Your Grid View. There are two tabs.
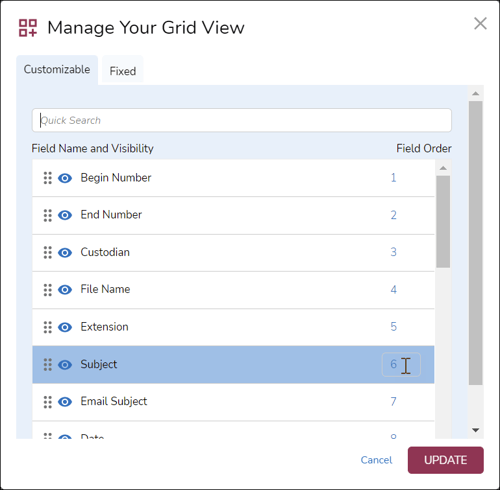
- Customizable - Metadata fields in the currently-selected Field Profile are managed here, with the ability to:
- Re-order in the Grid, by either grabbing the 6-dot handles at left of the Field Name and moving or by clicking into the Field Order number to change the number.
- Turn Visibility in the Grid on or off by clicking on the 'eye' icon to the left of the Field name.
- Click UPDATE when complete.
- Fixed - Review icons indicating attributes of documents are listed here in fixed order.
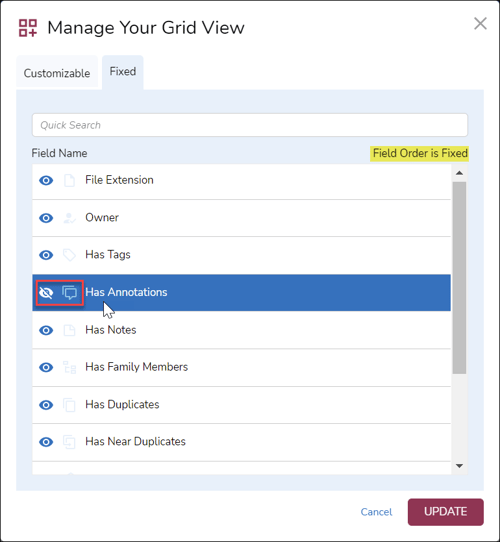
- Turn Visibility in the Grid on or off by clicking on the 'eye' icon to the left of the Field name. Note the sample Review icon for the field.
- Click Update when complete.
- Customizable - Metadata fields in the currently-selected Field Profile are managed here, with the ability to:
- Next in the Grid Toolbar is the Field Profile selector dropdown menu. Select a Field Profile from the list of those available to you based on team assignment.
- To the right of the Field Profile selector, if permitted, you may open Manage Field Profile by clicking the gear icon. There are two tabs:
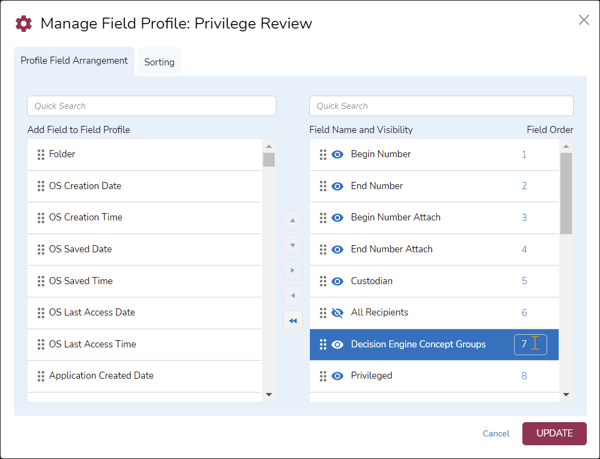
- Profile Field Arrangement - As in the Admin Field Profile screen, you may configure the elements and display of the field profile; either list may be filtered using the Quick Search box at the top:
- Add Field to Field Profile by either clicking and dragging from the left to the right pane, or select and click the right arrow button [>]. You may also remove a field or fields from the field profile by clicking and dragging from the right to the left pane, or by selecting and clicking the left arrow button [<]. Clearing the entire field profile by clicking the double left arrow button [<<] should be done with great caution; use Cancel to leave the screen without saving to undo.
- Field Order is changed by either grabbing the 6-dot handles at left of the Field Name and moving or by clicking into the Field Order number to change the number.
- Visibility for any field is changed by clicking the 'eye' icon to the left of the Field name. An eye icon with a slash through it is not visible but remains part of the field profile.
- Click Update when complete.
- Sorting - Change the order in which data records are presented in the Grid; either list may be filtered using the Quick Search box at the top.
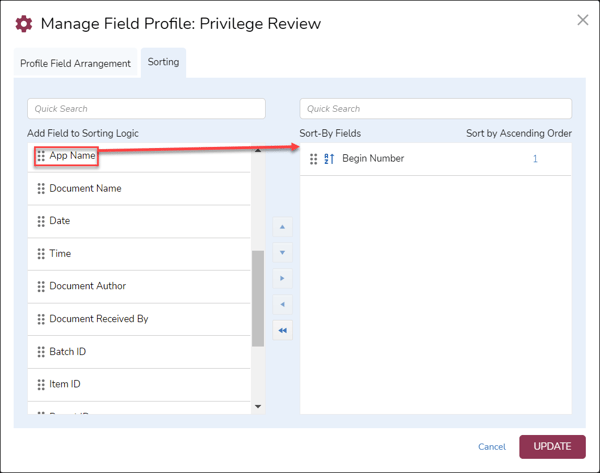
- Add Field to Sorting Logic by either clicking and dragging from the left to the right pane, or select and click the right arrow button [>]. You may also remove a field or fields from the field profile by clicking and dragging from the right to the left pane, or by selecting and clicking the left arrow button [<]. Clearing the entire field profile by clicking the double left arrow button [<<] should be done with great caution; use Cancel to leave the screen without saving to undo.
NOTE: A field such as Begin Number which is a unique value will always sort, and thus would be a tie-breaker if the user desires to use a value such as App Name to organize the Grid by document type. - Sort by Ascending Order can be set by either grabbing the 6-dot handles at left of the Field Name and moving or by clicking into the Field Order number to change the number. The field at the top of the list will be designated as the first sort level, with the following field second sort level.
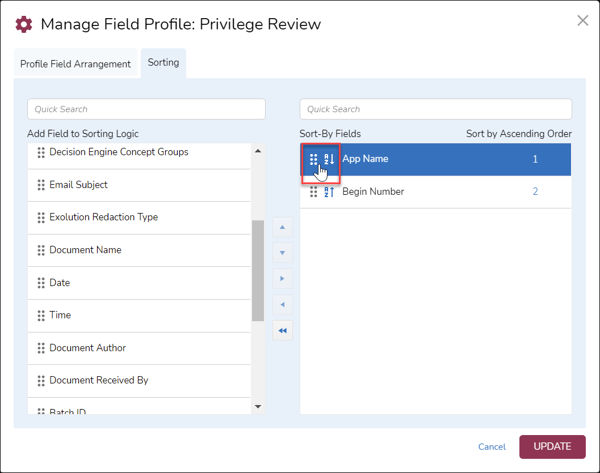
- Sort order within a field is set by clicking the icon to the left of the Field Name to ascending (arrow up) or descending (arrow down).
- Click Update when complete.
- Add Field to Sorting Logic by either clicking and dragging from the left to the right pane, or select and click the right arrow button [>]. You may also remove a field or fields from the field profile by clicking and dragging from the right to the left pane, or by selecting and clicking the left arrow button [<]. Clearing the entire field profile by clicking the double left arrow button [<<] should be done with great caution; use Cancel to leave the screen without saving to undo.
- Profile Field Arrangement - As in the Admin Field Profile screen, you may configure the elements and display of the field profile; either list may be filtered using the Quick Search box at the top:
Customizing the Document Review Screen
- Click to open a document in the Document Review screen from the Grid or the Results Pane.
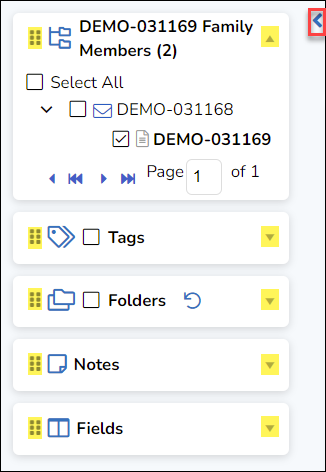
- Document Review will open with arrows on either side of the Viewer to open or close a coding pane.

- Expanding the left coding pane by clicking the arrow shows all panels for this document (all collapsed in this view except for Family Members). The panels will include all existing relationships, including Email Threads, Near Duplicates, Duplicates and Relational Documents, along with Tags, Folders (including any available Work Folders and Transcript Folders), Notes and Fields.
- Expand the right coding pane by clicking its arrow to open.
- Grab the six-dot handle at the left of the panel you wish to move and drag it to the right coding pane. Do this for each panel you wish to move.
- Click the down-arrow at the right of each panel to expand. In the illustration below, Notes has just been moved between Folders and Fields.
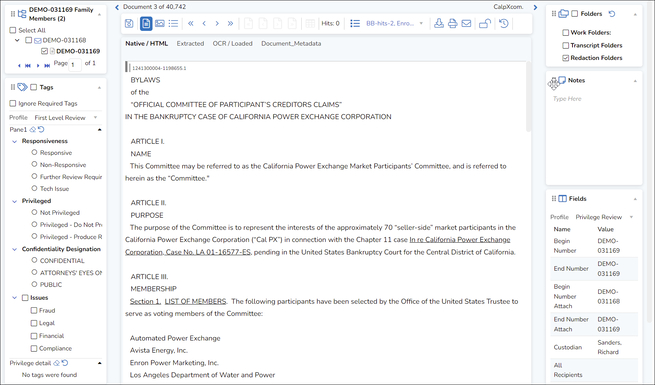
- Document Review will retain the updated settings automatically, though on login to a new session the right coding pane may first appear as collapsed.
Last Updated 1/04/2023