
This article sets out how to create and customize permissions for users in role groups.
Non-Audio Video Tutorial
The main function of Roles lies under Assign Permissions, where access to Reveal resources is defined as required for each Role and the Role Group(s) assigned to it. Select a Role and click Assign Permissions to view and change permissions as necessary.

The default Roles may be modified to add or remove certain permissions for a project. It may be worthwhile if viewing extensive permission changes to create a custom Role to be assigned to a Role Group. This is how to create and configure a custom Role:
- Log in to Reveal as an Administrator.
- Open a Project, or click Admin at the Project Hub.

- A Project Admin window will open to the Permissions screen.
- The third tab in the menu at left opens the Roles screen, which will display the default Roles created with the Project with their default permissions:
- Administrators - All permissions. This would normally be a System Administrator responsible for the entire review environment.
- Client Administrators - All permissions except user management and deleting documents. This Role is a good fit for a Project Manager group.
- Power Reviewers - Review permissions plus the ability to see all documents, some bulk operations and public item management are included by default.
- Reviewers - The ground troops of the discovery process: may view, code, and redact documents as well as bulk tag related documents by default.
- To create a Role, click Add.
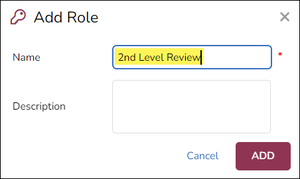
- Enter the required Name.
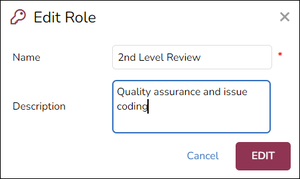
- You may optionally add a useful Description, or Edit to add it later.
- Click ADD when complete.
- Select the newly-created Role and click Assign Permissions. This opens a modal where access to Reveal tools may be enabled or disabled.
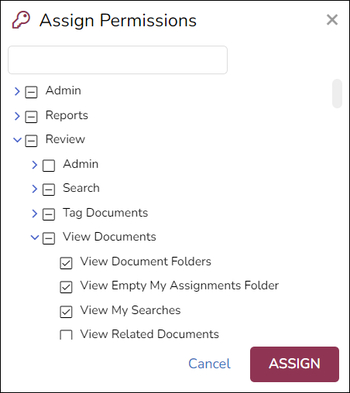
- A checkmark indicates a permission is enabled.
- A checkmark at the folder or subfolder level indicates that all permissions under that folder are enabled.
- A blank checkbox indicates that a permission is disabled.
- A blank checkbox at the folder or subfolder level indicates that all permissions under that folder are disabled.
- A dash at the folder or subfolder level indicates that some permissions under that folder are enabled and some are disabled.
- Click ASSIGN to set the selected permissions for the role.
- If the permissions are modified, users within the affected Role Group will need to log out and log back in for the updated permissions to take effect.
- See Permissions Administration for detailed permissions information.
For more information about Reveal permissions see
- How to Set User Team Membership and Permissions
- Permissions Administration
- How to Create Teams
- How to Create Role Groups
Last Updated 12/02/2022