
This article provides both visual and written instructions for assigning review documents for a project.
Non-Audio Video Tutorial
Assigning documents is the practice of dividing up sets of documents to be reviewed by multiple users in a controlled manner. Commonly referred to as batching, it is managed in Reveal with the Assignments feature available to project managers having administrator or client administrator permissions.
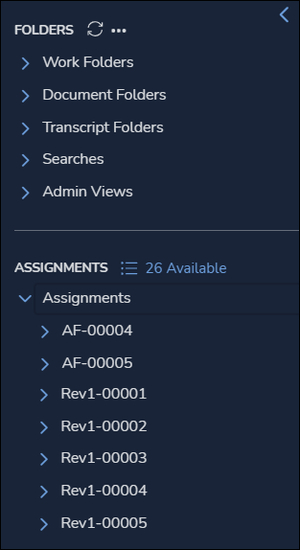
Users can check out assignments available from a Pool by clicking the ## Available link next to ASSIGNMENTS in the Sidebar to open the Assignments screen. The number indicates the number of assignments that are not yet checked out or completed for any of the user’s current tag profiles in the project. Assignments directed to a User or the User's Team (which are allocated proportionally across the Team) or generated by AI-Driven Batches appear in folders directly under Assignments.

- On the Grid tab toolbar, open the Assign item to manage the batching of documents and the assignment of foldered batches to users. A Reveal administrator can select project documents to assign from any document list, search results or work folder.
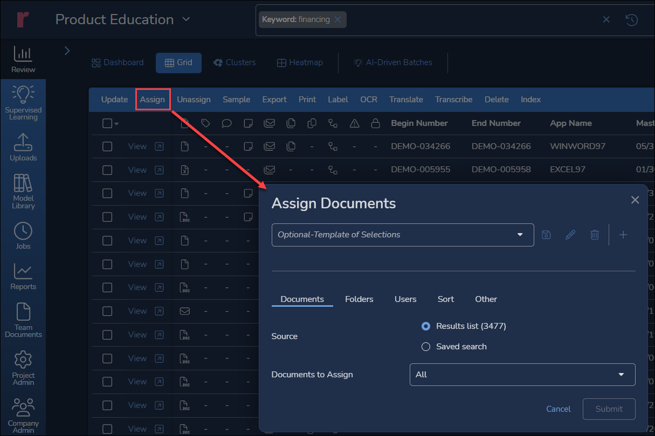
- Documents is the first tab, where source and type of assignment are specified. Source specifies where to draw the assignment from; further settings branch from there.
- Templates of previous assignment settings for the current project may be selected here or created and shared with other users or teams. Users may Overwrite, Edit or Delete a currently selected template of settings, or Create and name a new template, which may be shared in locked (default) or unlocked editable mode. Create is disabled until all required fields are filled.
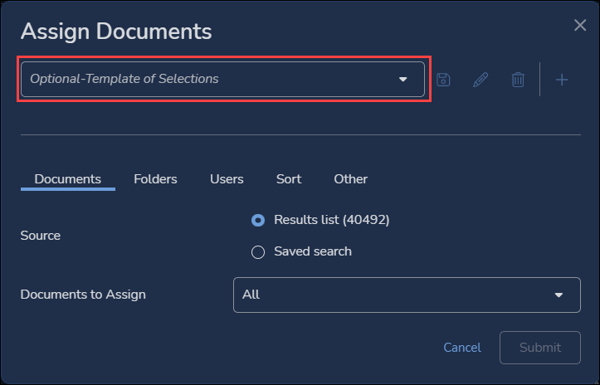
- Selected documents will appear only if documents have been checked in the Grid results list. These documents will be assigned with no further specification here.
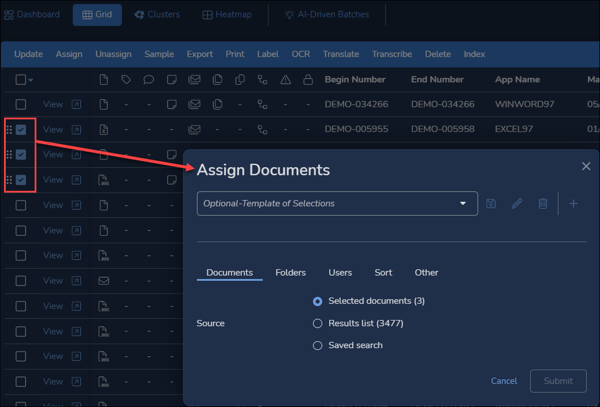
- All documents in results list which then offers further specifications depending on whether Documents to Assign is set to All or Random.
- All will assign all documents in the current result list.
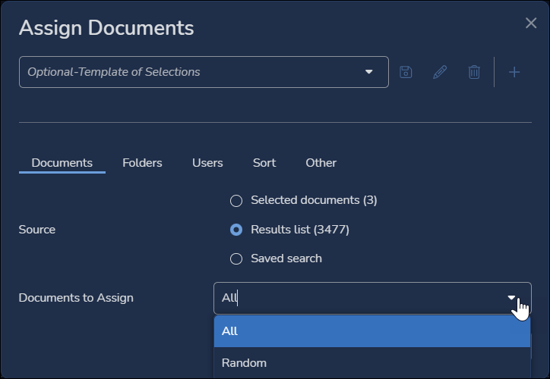
- Random will change the values available under Documents to Assign.
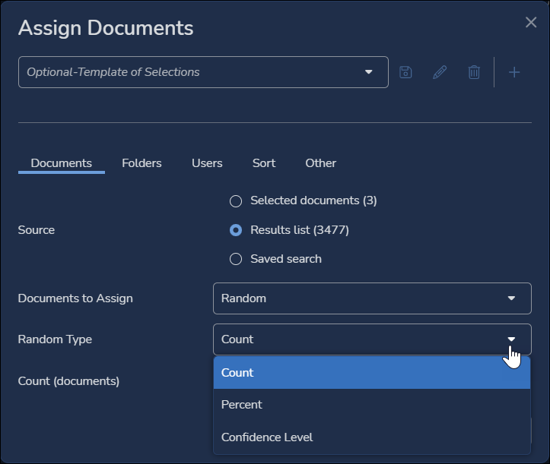
There are three type of Random selection available for assignment:
- Count will take a number of documents specified in Count (documents) below to be assigned from the source.
- Percent will take the percentage of source documents specified in the renamed Percent field below to be assigned.
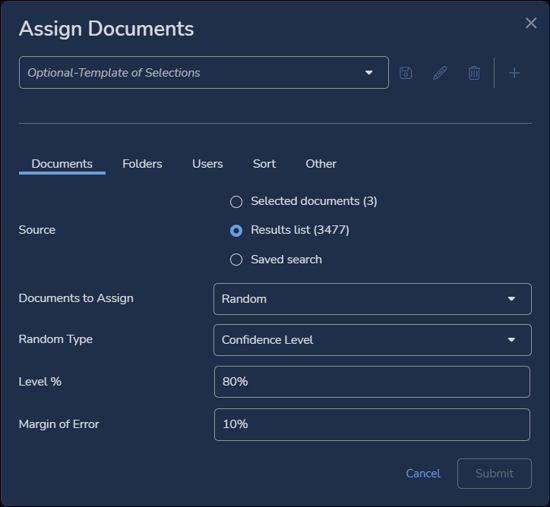
- Confidence Level will allow the project manager to specify Level % and Margin of Error assessed by Reveal's AI analysis of potential relevance.
- All will assign all documents in the current result list.
- Saved search – This will open a selection box from the list of saved searches. Once a search is selected, other criteria set out above may be configured for the search result list.

- Saved Search – Open Saved Search modal for selection. Only one saved search may be selected at a time.
- Search Frequency – How many times the search is to run for auto-assignment.
- Minimum to Assign – The smallest number of documents to batch from the search.
- Documents to Assign – All or Random; if All is selected, all results will be assigned. If Random, the following will be specified:
- Count will take a number of documents specified in Count (documents) below to be assigned from the source.
- Percent will take the percentage of source documents specified in the renamed Percent field below to be assigned.
- Confidence Level will allow the project manager to specify Level % and Margin of Error assessed by Reveal's AI analysis of potential relevance.
- Templates of previous assignment settings for the current project may be selected here or created and shared with other users or teams. Users may Overwrite, Edit or Delete a currently selected template of settings, or Create and name a new template, which may be shared in locked (default) or unlocked editable mode. Create is disabled until all required fields are filled.
- Folders tab controls the specification of containers for the assignments.
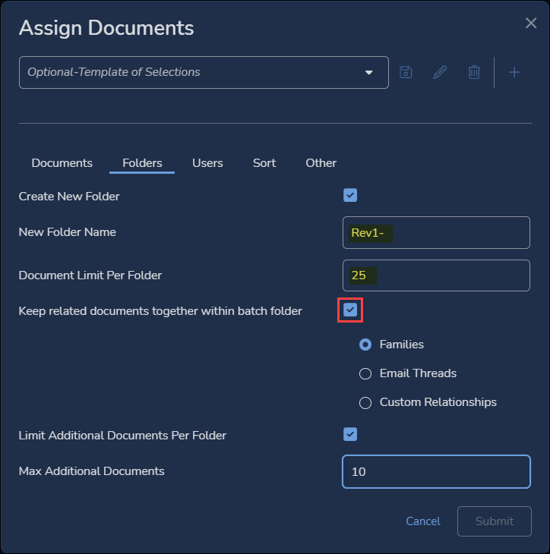
- Create New Folder is selected by default to create a New Assignment folder series (to be named below).
- New Folder Name is where a New folder name prefix is entered. In naming a new assignment folder, consider that the name will be concatenated with a subfolder sequence number, so ideally this should be brief; for example, 2ndLevel folder assignments will be named 2ndLevel001, 2ndLevel002, etc.
- Document Limit Per Folder specifies the assignment folder size, absent consideration of related documents.
- Keep related documents together within batch folder is a checkbox which if selected allows selection of one of the following:
- Families - Generally parent and child documents, such as emails and attachments.
- Email Threads - Includes all messages, replies, forwards and their attachments within an email conversation.
- Custom Relationships - Enables the specification of a custom relationship field in the project, to be selected from a list box that appears under this item if chosen.
-
Specification of Max Additional Documents that can be added to a batch by relationship is available if the Limit Additional Documents Per Folder option is checked.
- Users tab is where delegation of the assignment to reviewers takes place.
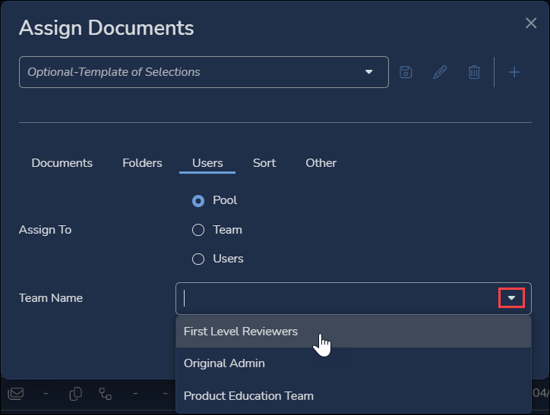
- Assign to offers choices of
- Pool as a location for reviewers under a specified Tag Profile to interactively check out assignment folders from Manage Assignments.
- Team distributes the created folders equally as possible across the members of a team.
- Users allows the specification of individual users for direct assignment.
- Team Name (opened by selection of either Pool or Team above) contains a list of teams in the project to be specified.
- If Users is selected, a two-column panel opens for filtering and selection of Users.
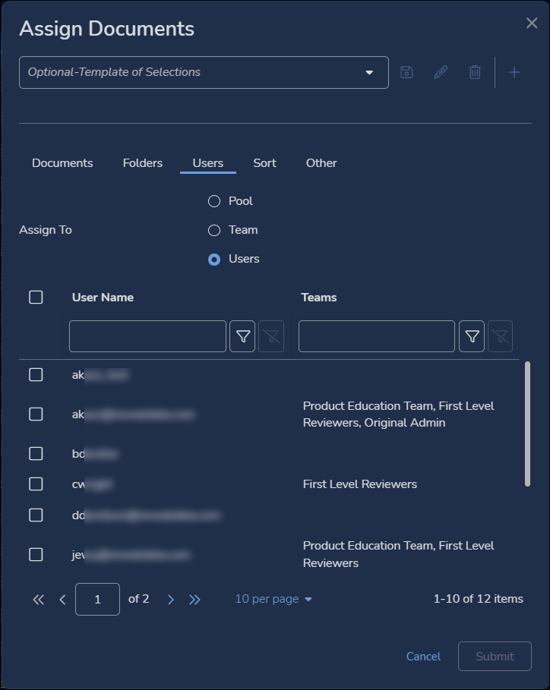
- The checkbox selects/deselects all users.
- The User Name column and the Teams column each contain a filtering header which includes the following elements:
-2.png?quality=high&width=550&height=555&name=05%20-%2007%20-%20Assign%20Users%20-%20Users%20(select%20with%20filters)-2.png)
- a box where an example may be entered;
- a filter for Contains / Does not contain; and
- a button to clear the filter.
- The panel may have multiple pages, with the number of entries per page configurable.
- Assign to offers choices of
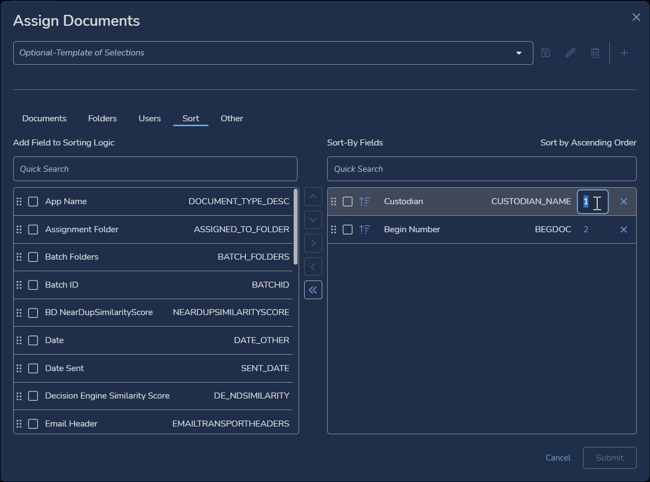
- Sort specifies the order in which the assigned documents will be organized.
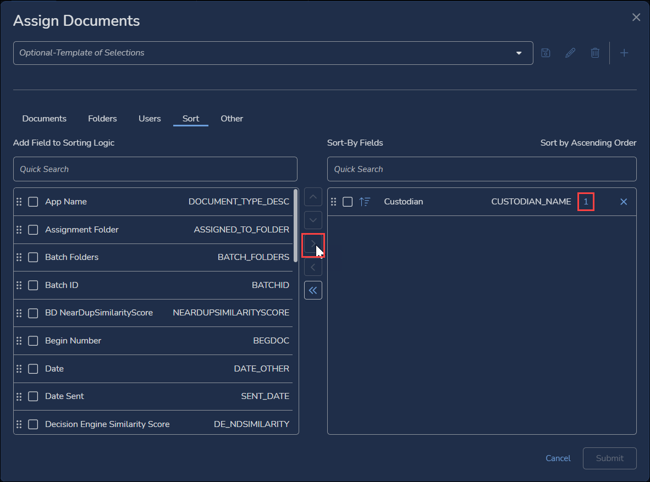
- In the Add Field to Sorting Logic column, all fields in the currently active field profile are presented alphabetically, each with a 6-dot grab handle to drag and drop to the Sort-By Fields column to the right. A Quick Search box may be used to quickly filter the list to a desired field.
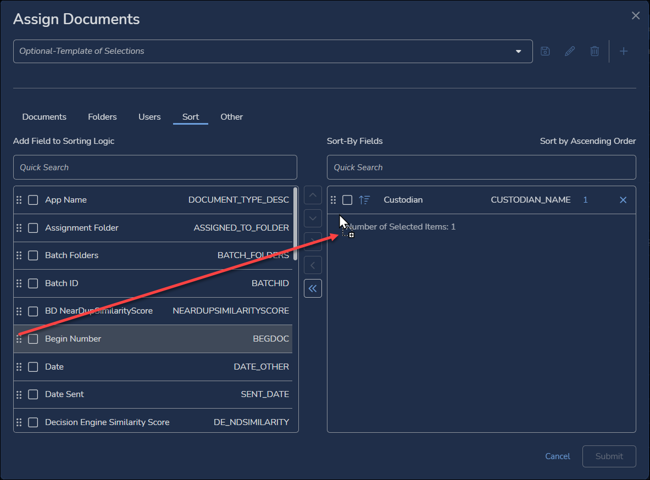
- The Sort-By Fields column contains the field order specified for the assignment's documents.
- The buttons between the columns may be used to move selected choices
- Up in the Sort-By Fields,
- Down in the Sort-By Fields,
- Into in the Sort-By Fields,
- Out of the Sort-By Fields, or
- Clear the Sort-By Fields.
- Each entry has a 6-dot grab handle to drag and drop the field up or down, or out of the Sort-By Fields column.
- Each entry has a Sort by Ascending Order number entry that can be changed to specify a primary or secondary or tertiary sort where there may be multiple fields specified.
- A Quick Search box may be used to quickly filter the list to a desired field.
- The buttons between the columns may be used to move selected choices
- In the Add Field to Sorting Logic column, all fields in the currently active field profile are presented alphabetically, each with a 6-dot grab handle to drag and drop to the Sort-By Fields column to the right. A Quick Search box may be used to quickly filter the list to a desired field.
- Other is where --
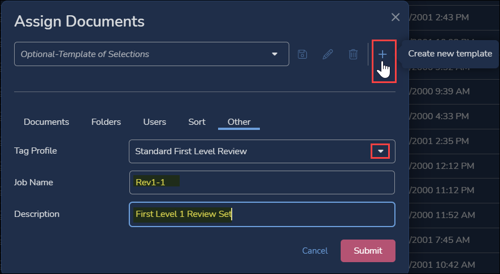
- the Tag Profile to be used for the assignment is selected, and
- the Job Name (optional but recommended) for processing the assignment foldering process (and optionally a Description of the assignment job) is specified.
- Once these parameters are supplied, the SUBMIT button becomes available.
- When all configuration is complete, click SUBMIT. If a warning condition is encountered, you will be advised and prompted to confirm.
.png?quality=high&width=400&height=189&name=05%20-%2011%20-%20Assign%20-%20Confirm%20(warning).png)
- You will be prompted to Confirm the assignment.

- You may navigate to the Jobs screen from the Navigation panel to see the Assignment job’s status.

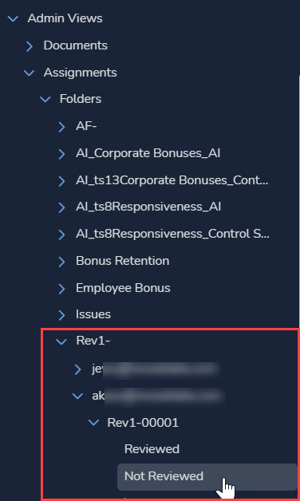
- When the assignment foldering job is complete, the assignment folders will be available for checkout by the assigned Teams or Users under Manage Assignments (for Pool documents) or presented directly under the Sidebar Assignments folder structure if User or Team or AI-Driven Batches was selected. Reviewed and Not Reviewed folders are created for each assignment, allowing the reviewer to instantly select that set of documents.
- Assignments are also visible and may be managed under Admin Views > Assignments.
- Users may check out batches from a pool under Manage Assignments, which is accessed by clicking the ## Available link in the Assignments Sidebar menu.
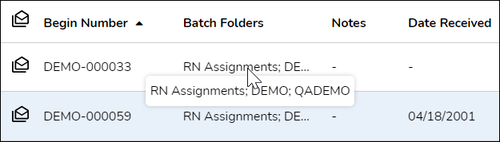
- As of Reveal 11.6, you may see and select on the assignment batches for each document using the Batch Folders field in the Grid.
Last Updated 10/06/2023