
This article provides both visual and written instructions for setting up a new project in Reveal.
Non-Audio Video Tutorial
Projects in Reveal are often equivalent to a specific legal matter or case. Projects are associated with specific Companies and Clients. There may be multiple projects for each Client (along with multiple Clients for each Reveal Company instance). Company Users are grouped and assigned to Projects, security is set, data is loaded and processed.
The creation and management of Projects is done by Instance or Client Administrators within the Company Admin section of Reveal's Web interface. Here are the steps to setting up a new Project in Company Admin in the Reveal user interface.
Create a Project in Company Admin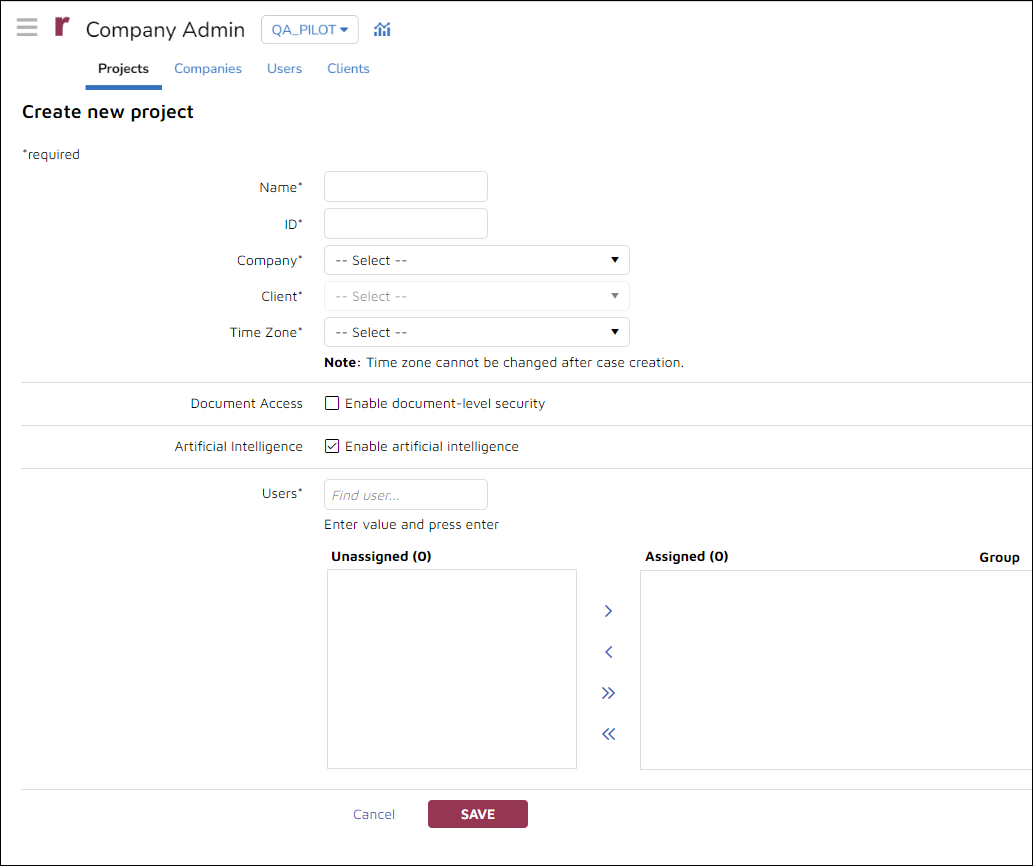
- Log in to Reveal as an Administrator.
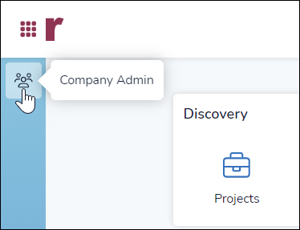
- Select Company Admin either from the Projects landing page or from the Navigation Bar within a Reveal project. You may also select Projects from the Discovery administration box.
- Company Admin will open to the Projects screen, listing current projects.
-
Click the Create new project button in the upper left corner. This will launch the create project screen.
-
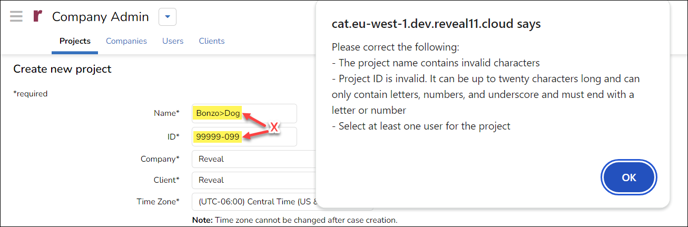
Name the project (required). NOTE that project names may be descriptive labels that include spaces, but not any of the following characters: : * ? \\ / < > | "
-
Assign a project ID (required). NOTE that a project ID is a billing reference of up to 20 character that may contain letter, numbers or the underscore character. As with the Project Name, an improper ID will be flagged on save.
-
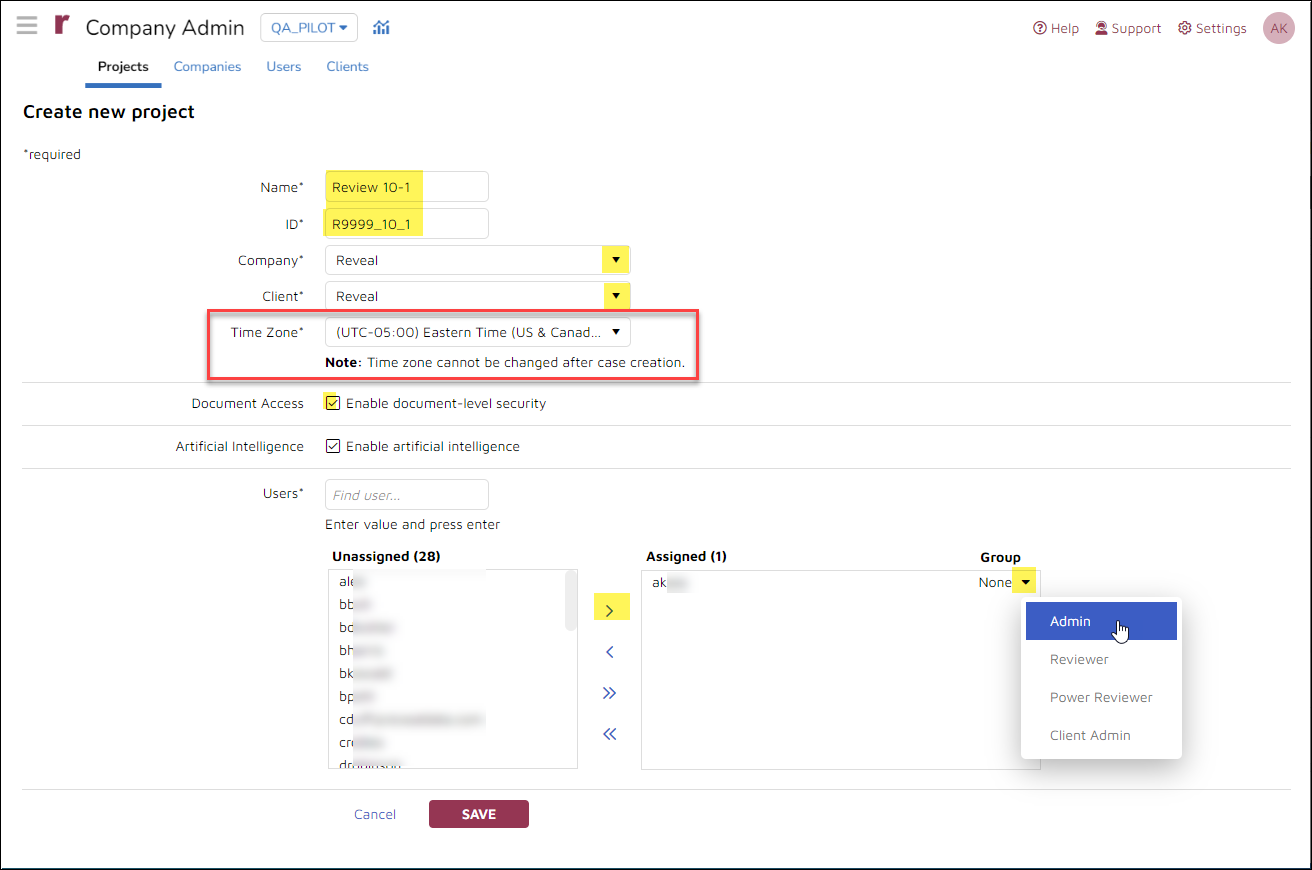
Associate the project with a Company, selecting from the dropdown list (required). The User list below populates when the Company is selected.
-
Associate the project with a Client, selecting from the dropdown list (required).
-
Set your project's review Time Zone to automatically normalize email metadata shown in HTML, extracted text and tiff-on-the-fly views to match the time zone that is set for your project here. Reveal will also normalize email metadata shown in images when performing a production or print job. NOTE: The time zone cannot be changed after case creation.
-
Select Enable document-level security to extend Reveal security for Document Access to individual documents; this must be selected for use.
-
Enable artificial intelligence is enabled for all projects by default.
-
Assign Users to the project.
-
Select a Group for each user who is added to the project. The group is what is used to assign permissions for the user for this project. You must add at least one user - ideally an Admin or Client Admin - to finish creating a project.
-
-
Confirm your information and click the Save button to create the project. It will look like this to show that the project is being created:

-
A pop-up will notify that the project has been successfully created.
Last Updated 12/19/2023