
Preliminary overview to Reveal access control and administration.
Security in Reveal occurs at several levels. There are access controls, user account control, file system access, role-level permissions, document-level security, and various types of assigned access to profiles, folders and assignments. This document is intended to provide an overview of these layers of administration with links to the details.
Access Controls
Due to the security built into Reveal applications, all users need to be authenticated and all their actions need to be authorized. The main component for user authentication is Keycloak (KC) and all the users' actions are authorized based on their assigned user rights stored in a database server. All user alteration mechanisms are routed into KC, for example, changing a user's email address or name. Any action to alter a user account must use a back-end mechanism within the client accessing KC to issue requests to an application which would then use configured credentials to call KC.
The general idea is that Reveal has a centralized way to integrate our applications from a project-membership perspective. For example, we wanted administrative users to easily be able to seamlessly share Processing projects with Reveal and vice versa without any additional logging in. Keycloak provides a centralized authentication mechanism, and additionally stores project membership across applications.
Reveal uses other mechanisms, such as proxy services and settings, to secure communications and access, and single sign-on (SSO) integrated with KC and two-factor authentication to provide a secure single point of entry before a seamless Reveal project environment. For more information, see Single Sign-On Installation & Integration Guide.
User Account Control
User accounts are created and administered in one of two locations in Reveal: under Company Admin in the Reveal User Interface's Admin menu, or in Review Manager under Project Setup > Users.
Users are created with unique account names which are stored with the individual's email address. Each may then be assigned to a project or projects as a member of a specified Role Group, which will define the user's initial permissions within the project. Users may be readily added to or removed from a project, and user accounts may be disabled across the entire Reveal environment.
Users log in using the individual's unique Reveal account name and password, and are then prompted to enter the two-factor code generated by Google Authenticator or other mechanism installed and synchronized on their mobile phones.
User passwords are prompted upon account creation along clear and stringent guidelines. If a user is locked out, an administrator may reset the password, which will send a notification that will enable the user to enter a new password. The administrator cannot set the password directly. See How to Troubleshoot Login for more information.
File System Access
Files for the Reveal environment are stored in AWS and accessed using S3 Browser. Each client has a fully-partitioned storage location in AWS under which project folders are created and populated. AWS requires an Access Key ID and a Secret Access Key generated and supplied by Reveal along with the name of the project bucket to be addressed by S3 Browser.
For more information see Reveal’s Security Policy for Files Uploaded to the Reveal Platform.
Role-Level Permissions
User permissions and access to Reveal projects are set under the Admin > Permissions screen. User Permissions Management is where a Project Manager as Administrator manages access controls and review groupings. At the most basic level,
- Users have permissions to see and use the Reveal functions available to their Roles.
- Users' scope of action (profiles, assignments, views) is defined by their Team membership.
Users are assigned to a Group (also known as a Role Group) for each project, defining a user's position in the review hierarchy for the project. This links each user to the permissions set for the Group's associated Role to access different parts of Reveal, defining what a user can see. 
The four standard Role Group Names match the four standard Role Names:
- Administrator - All permissions. This would normally be a System Administrator responsible for the entire review environment.
-
Client Administrator - All permissions except user management and deleting documents. This role group is a good fit for a Project Manager.
-
Power Reviewer - Review permissions plus the ability to run some bulk operations and public item management by default.
- Reviewer - The ground troops of the discovery process: may view, code and redact documents as well as bulk tag related documents by default.
The main function of Roles lies under Assign Permissions, where access to Reveal resources is defined as required for each Role.
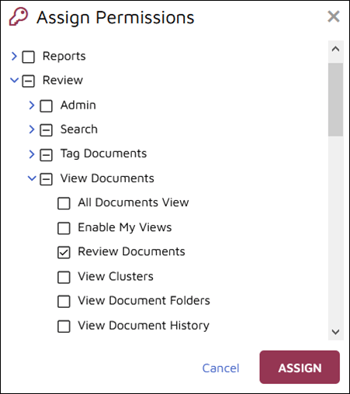
For more information about role level permissions, see Reveal Permissions Administration and How to Set User Team Membership and Permissions.
Document-Level Security
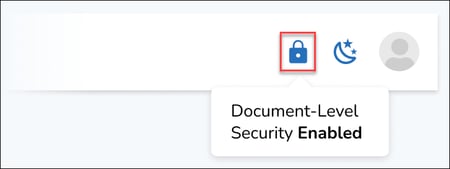
Document-Level Security is enabled using a checkbox when a project is created in Company Admin > Projects or Review Manager > Instance Setup > Project. It is intended for granular control over access of potentially sensitive material. If enabled, the administrator may retrieve and secure documents to limit the access of classes of users. A secured document will have this icon in the upper right corner of the Dashboard / Grid screen:
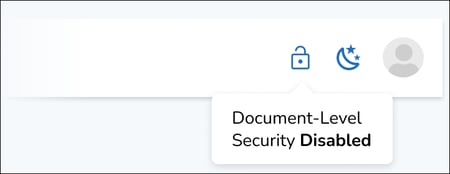
If Document-Level Security is disabled for a document or set of documents, the following will display:
The Secure control is displayed to Administrators, allowing Team-level access control to selected documents (whether by search result or direct selection). Here is a sample direct selection with the Grid in Dark Mode. 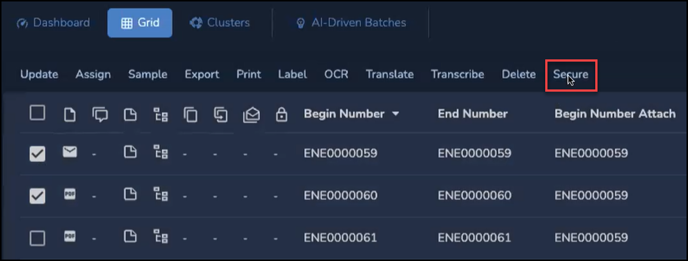
Secure opens a pop-up window, first to the Act On tab where the user chooses between documents individually-selected from the Grid or the current results list of documents. 
The administrator then sets the following in the Secure Documents tab:
- Select Action - choose between
- Add Access in a comprehensively restricted dataset, or
- Remove Access to restrict access to selected documents.
- Job Name is optional but helpful to log and reference this action.
- Select Teams (required) is where Teams are selected for access control.
- Click SUBMIT when done.
The result will affect the document totals displayed in the Dashboard and Sidebar folder items.
Other Access Settings
- There are controls to administer access to (and read/write or read-only permissions for) work folders.
- Access to Assignment folders, field and tag profiles may in some cases be done by user, but is most often assigned by team. Users may be added to the team at any time to gain access to the team's resources.
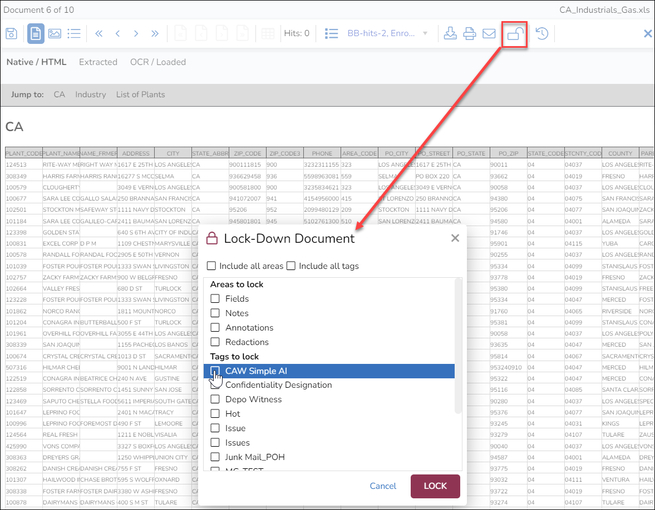
- Codable parts of Documents may be locked, including fields, notes, annotations, redactions and selected tags. The lock icon in the Viewer toolbar opens a popup window where the extent of the lock is set.
Last Updated 10/26/2023